

How I built my artist's studio on a budget

Moving house this year meant I had to leave my much-loved garage studio behind.
I converted the spare room in the new place into a creative retreat - which worked well for a time. But with an energetic 3 year old, my partner also requiring a space to work from, and the rest of the house to renovate, the urge to have somewhere separate was appealing - if not a growing necessity.
I wrote in an earlier post about renovating an already existing garden room as my studio - but in the end it wasn’t practical (but I did turn it into a little pub…silver linings and all that).
I looked into garden offices - the ones built by a specialist company - but the costs were far out of my reach. I considered building a structure from scratch, but the price of raw materials is currently astronomical.
The best idea I could come up with was to build a timber base and situate a flat pack log cabin on top and then revamp it to my own specifications including power.
I gave myself a budget of £4k. Could this realistically be done? It seemed almost impossible - but I’m stubborn and so took on the challenge.
Here’s how it went, step by step….
Preparation and leveling
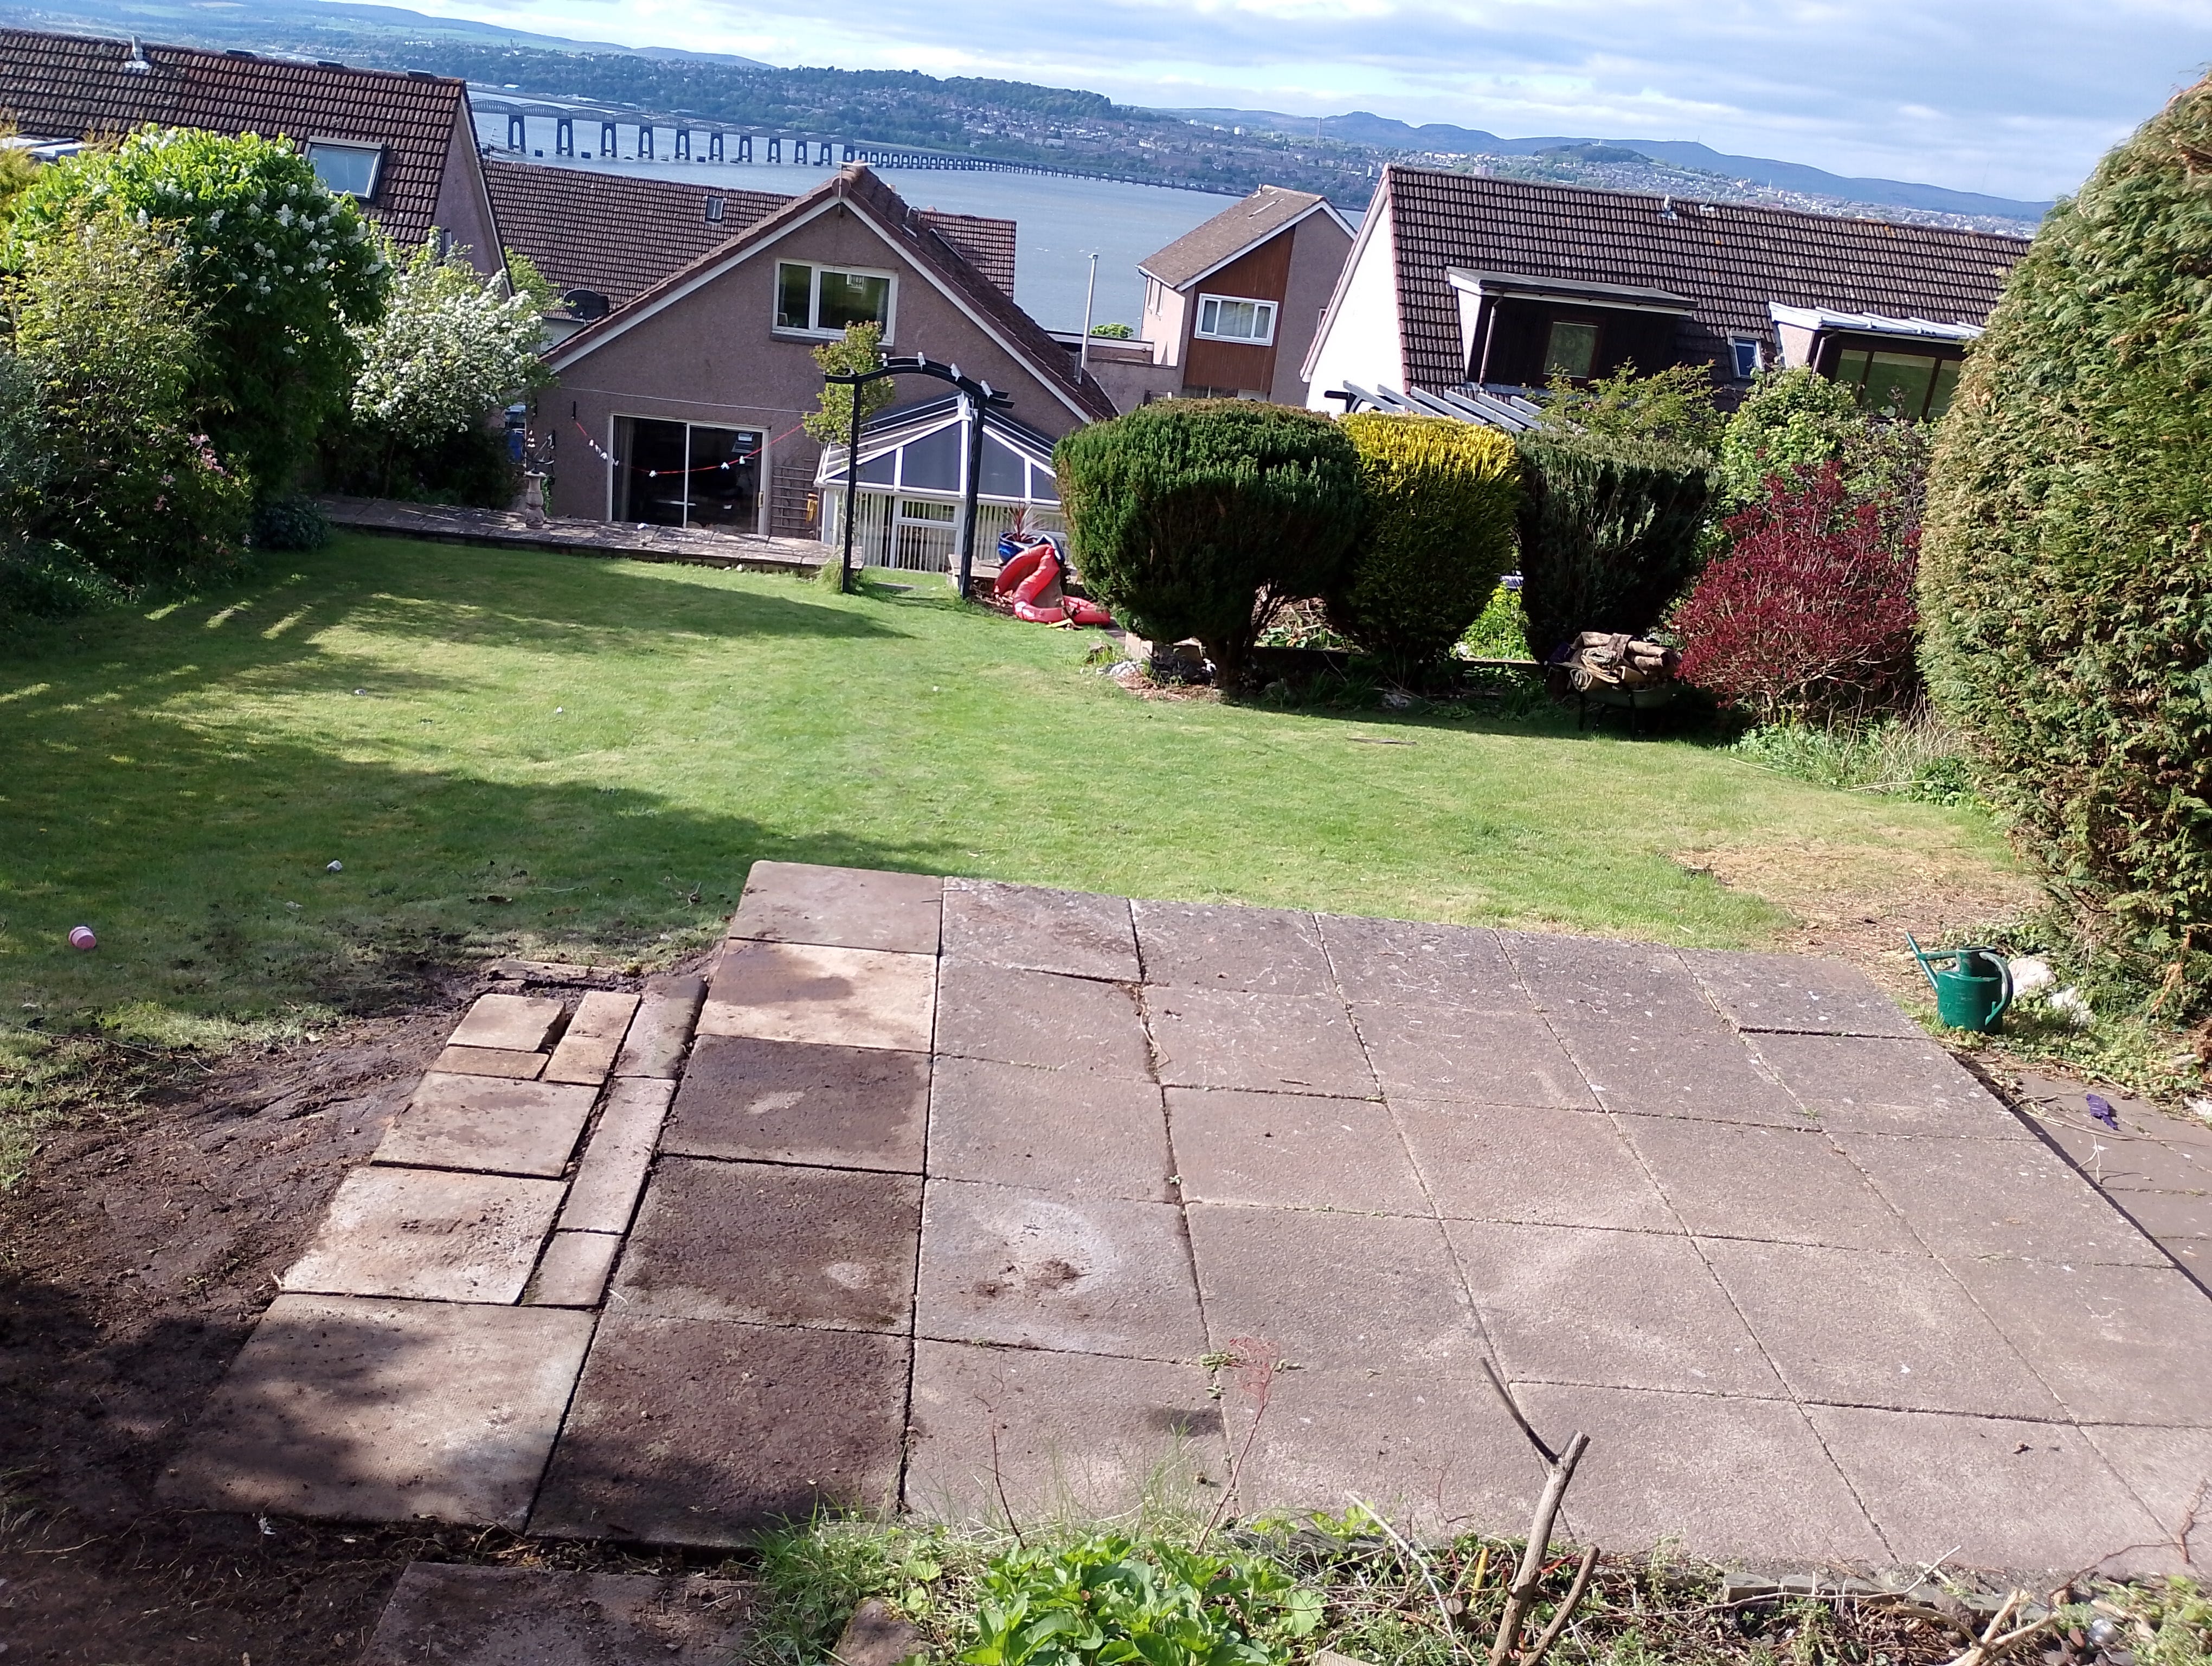
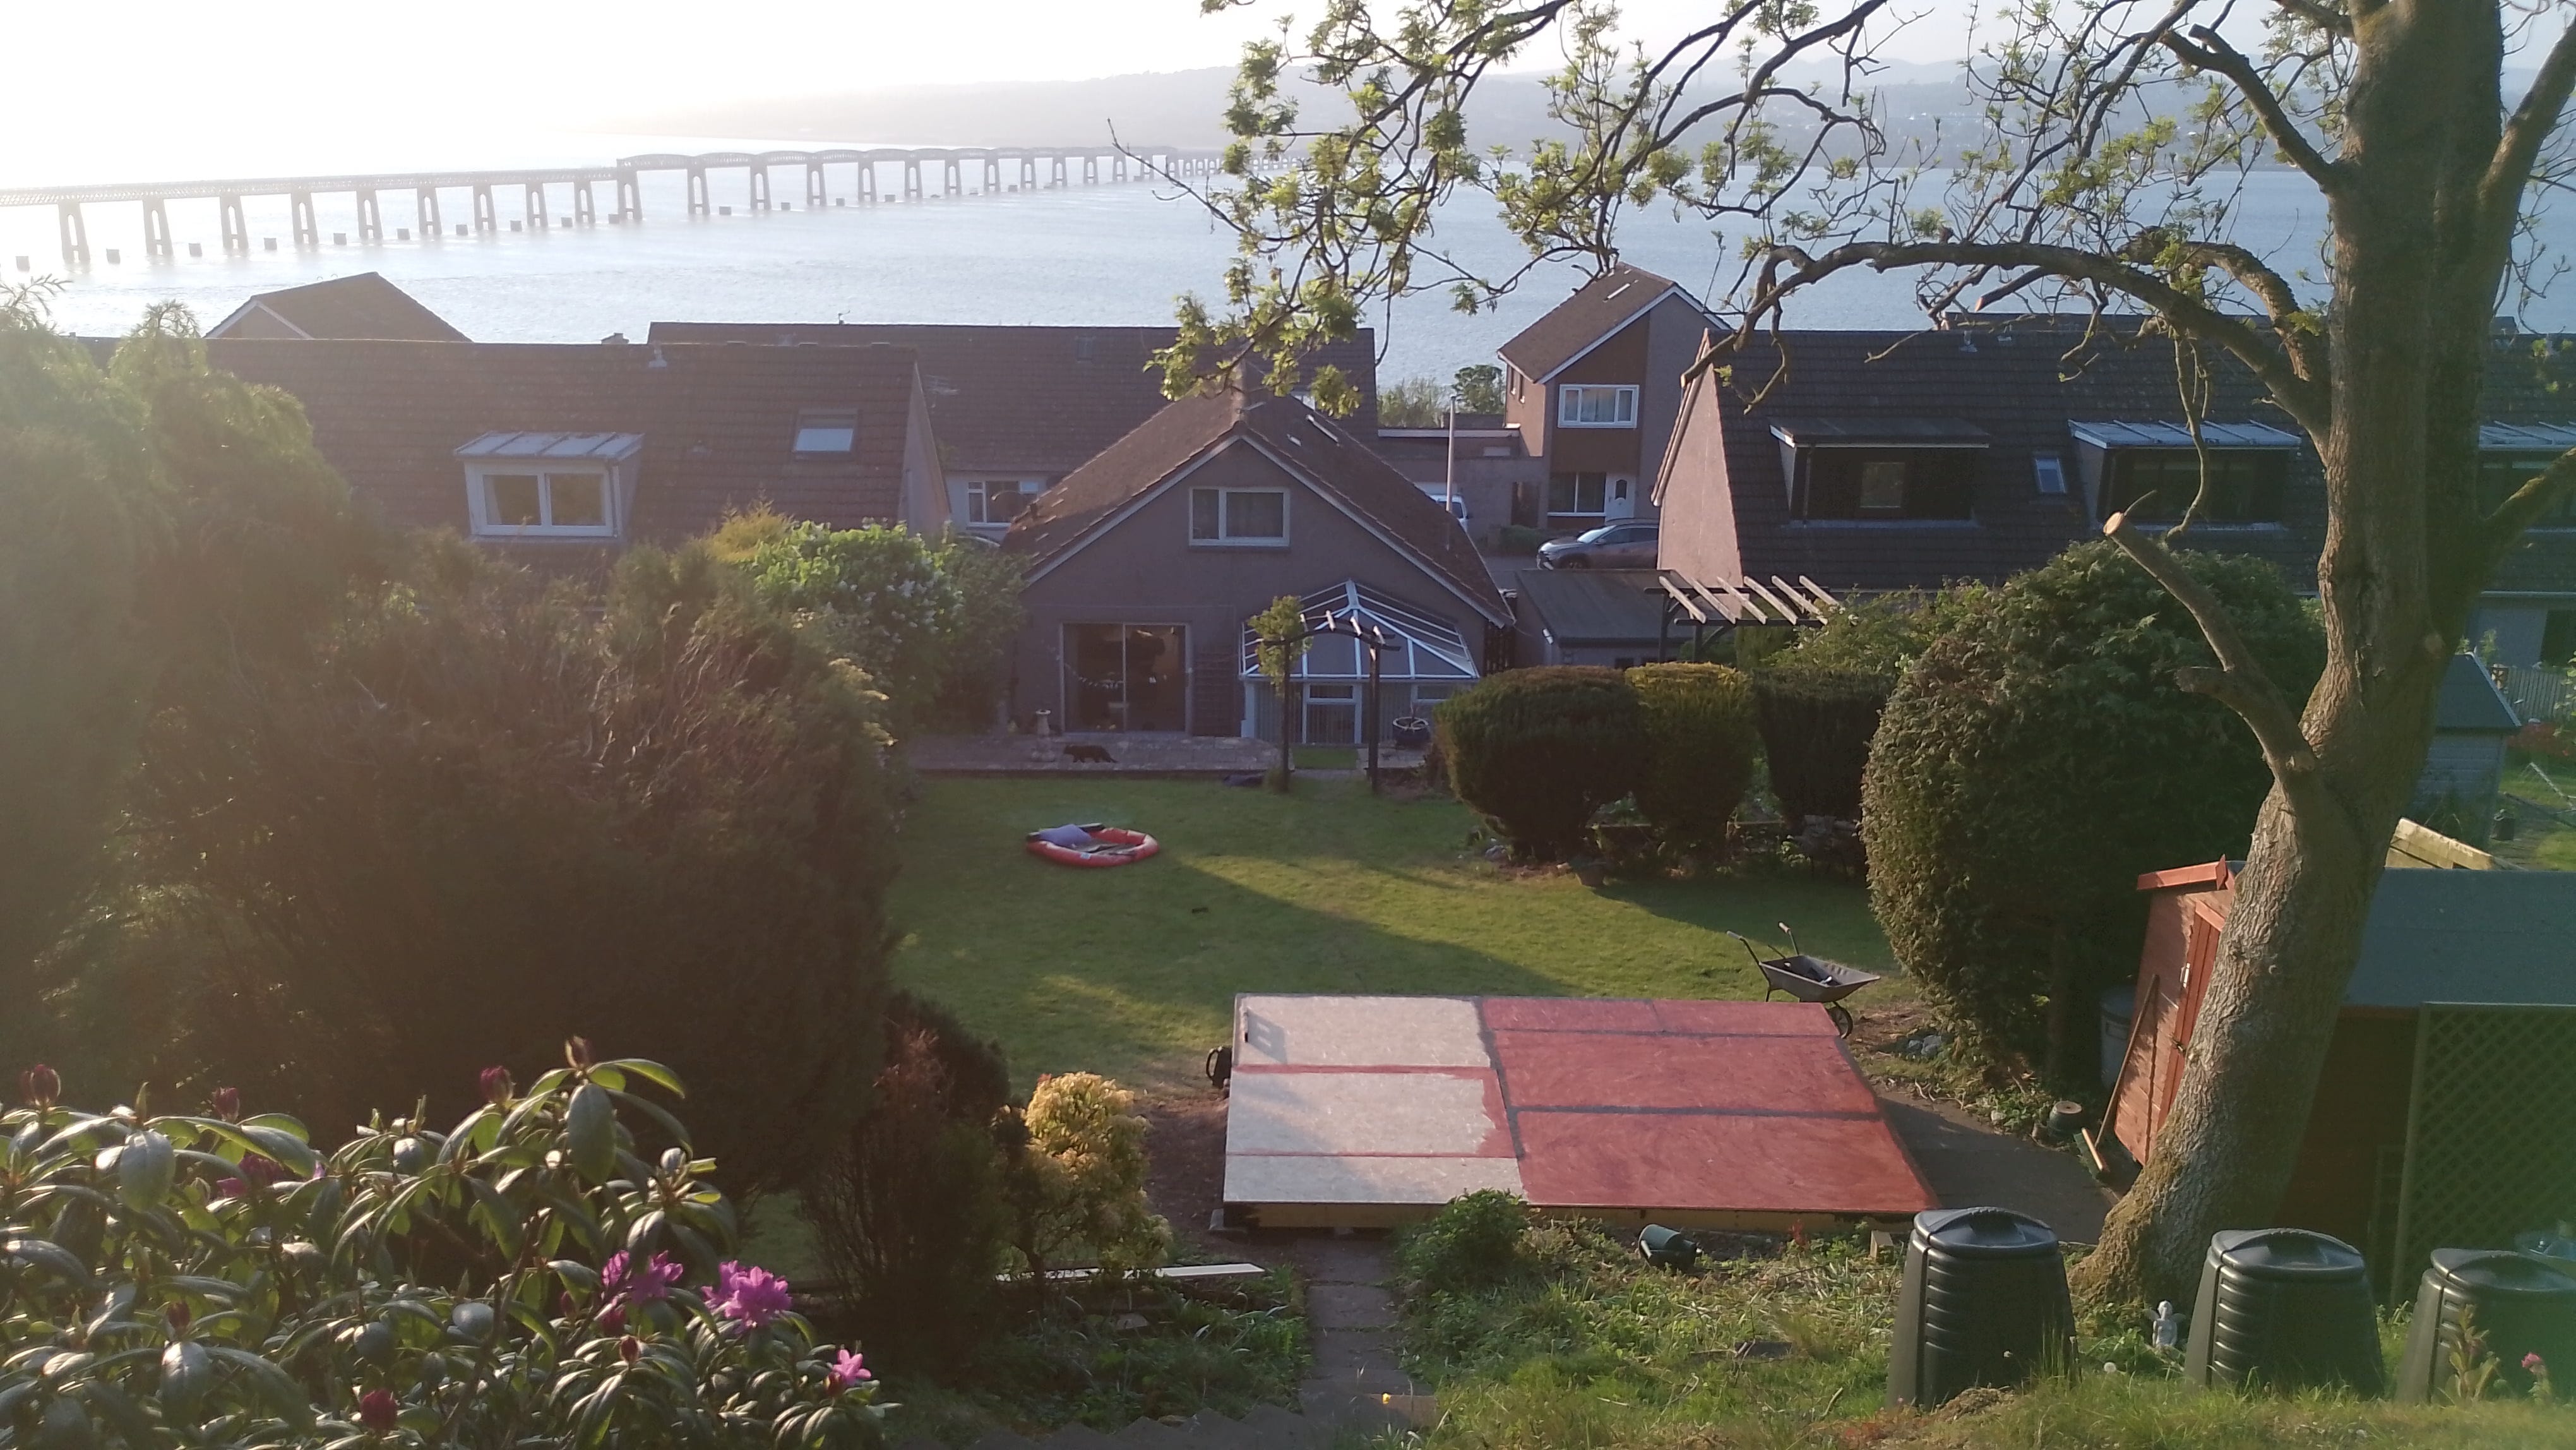
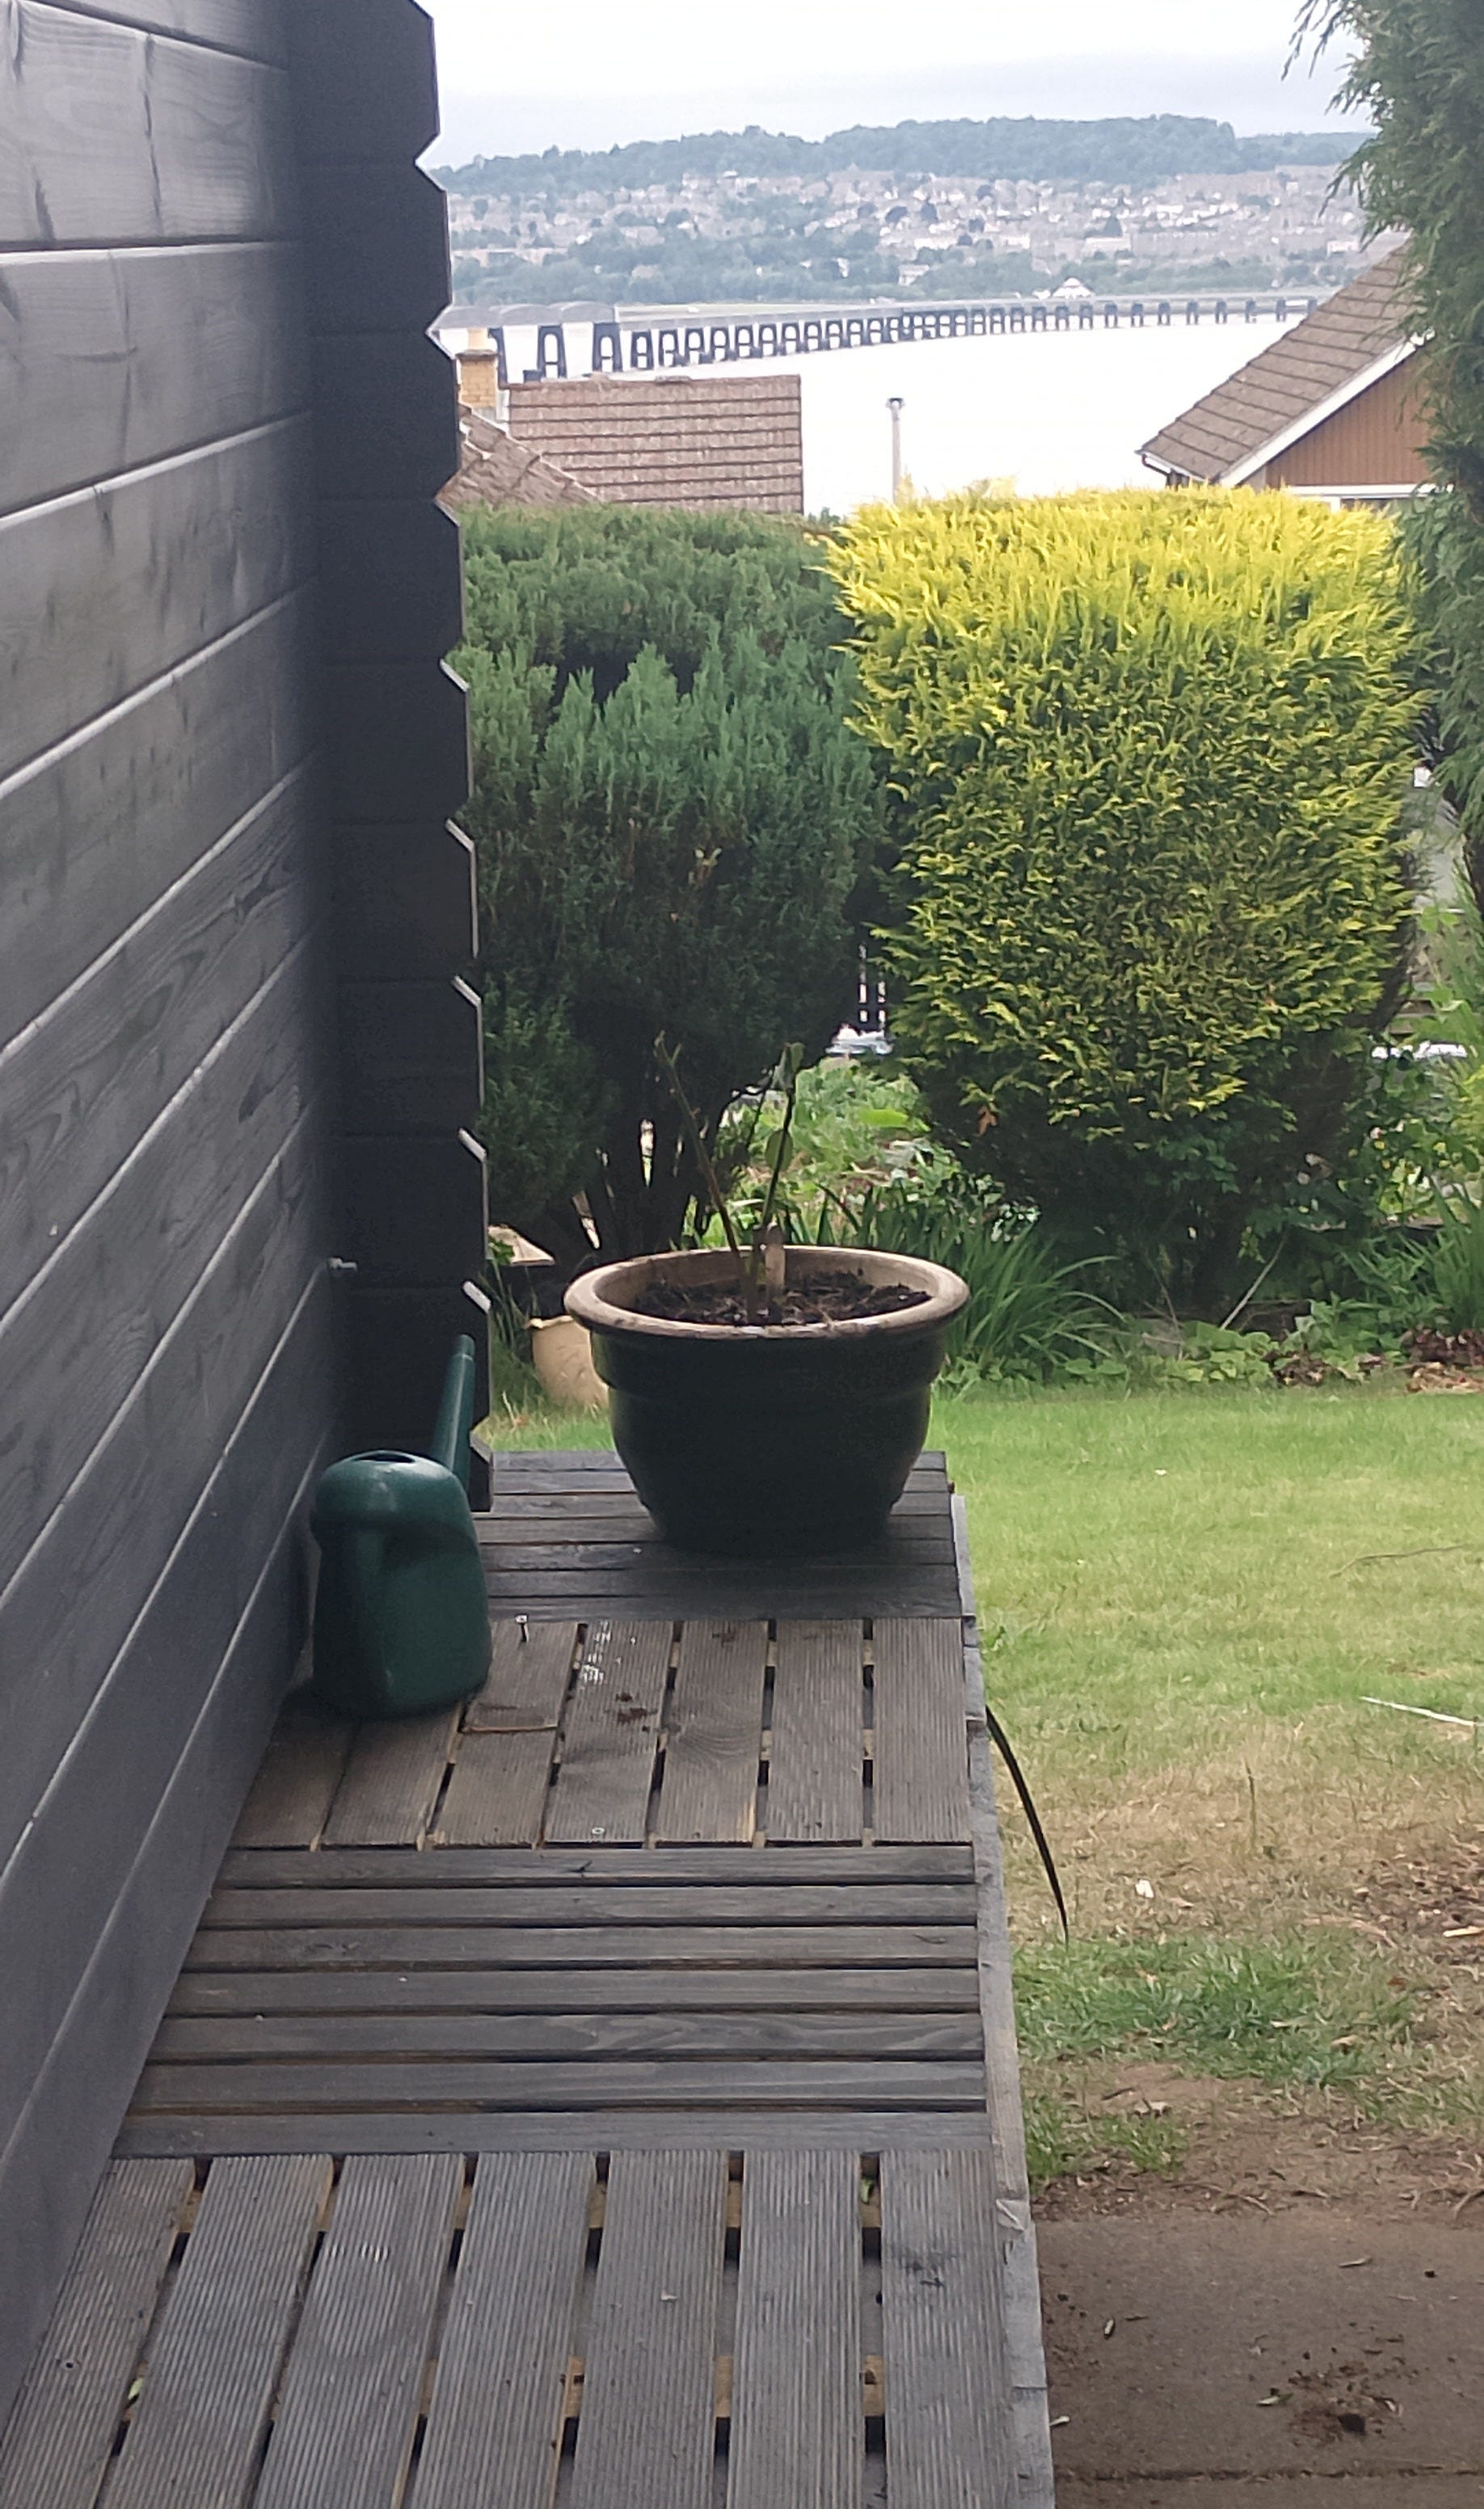
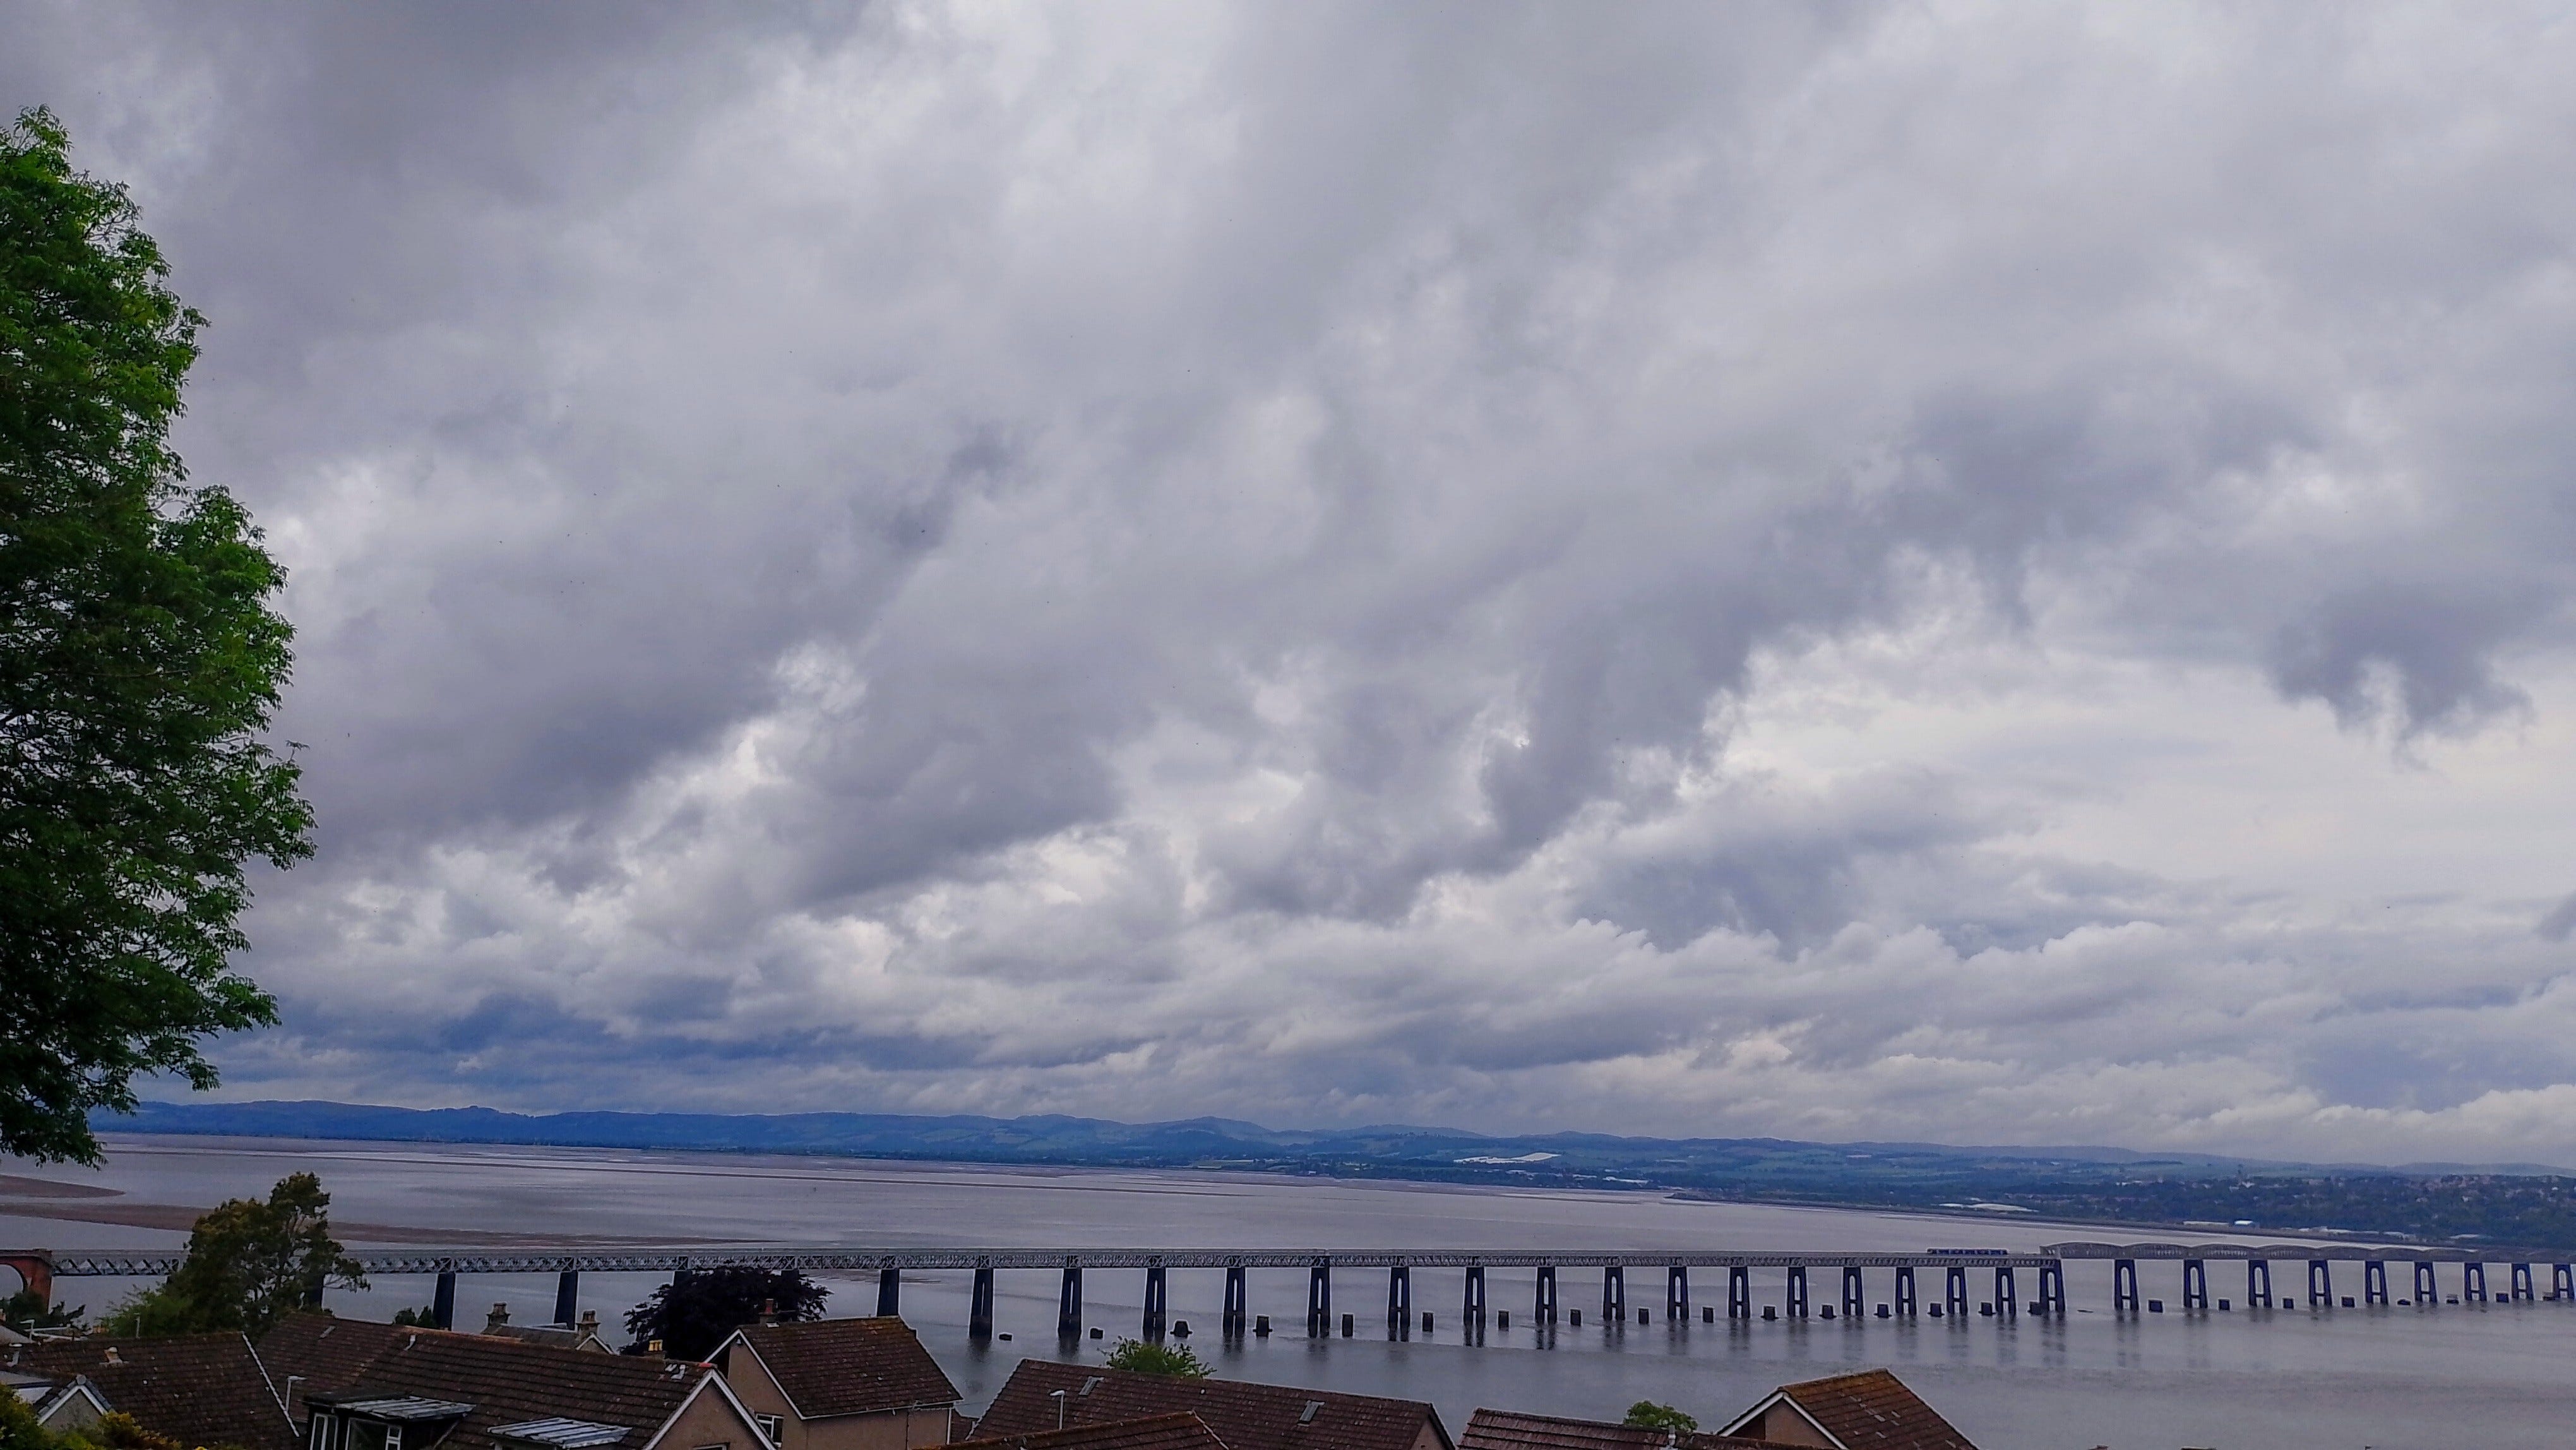
Before I began anything, I spent time getting used to the lay of the land - working out the light variables, temperature and noise levels. In the end everything seemed perfect including the old ash tree that would give me much needed shade. I also had to consider the height and angle - which would give me the perfect view of the river - and privacy for me.
I decided to stick with a rough universal size of 4x3 metres for the cabin. As long as it had high ceilings and plenty of light, this would work.
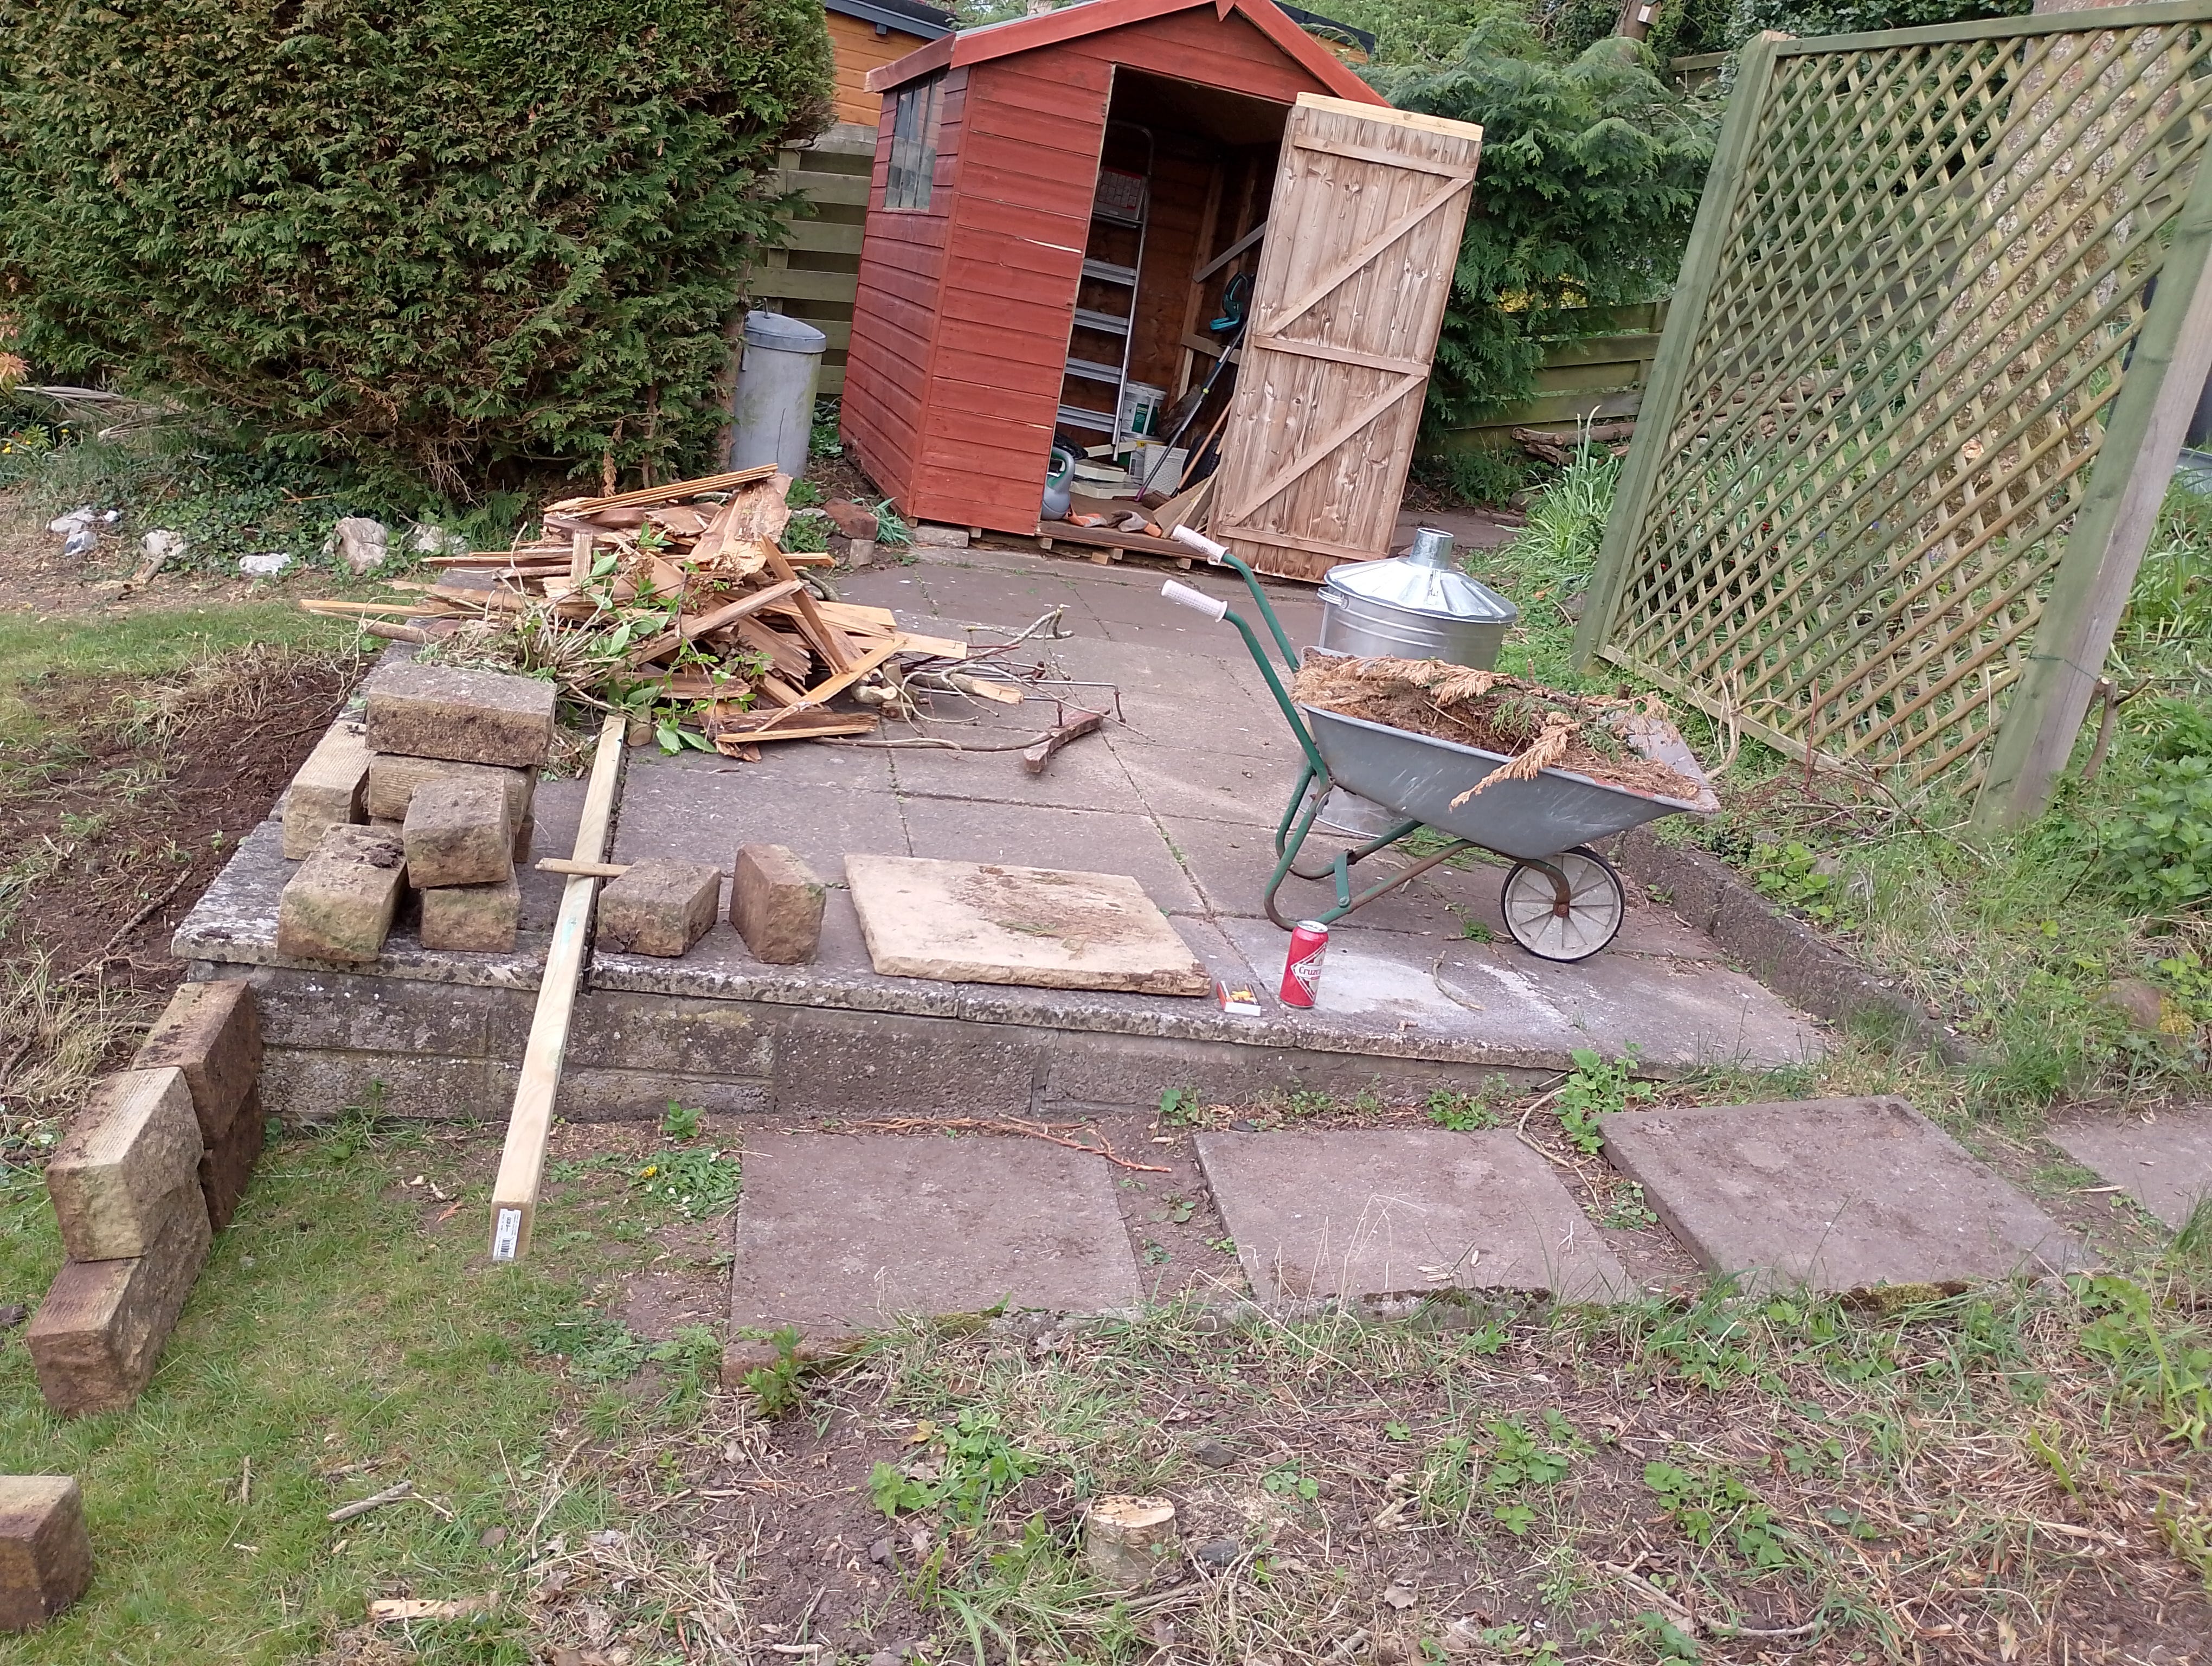
I wanted to utilise the existing slab patio area but this was only 3x3m so it needed to be extended. I took up the existing path slabs and set them aside. Then I backfilled the land with aggregate - once this was done, I added the existing slabs and leveled them off . I removed any existing plant life and a large trellis which was anchored on tall posts - these posts were recycled for the base and so, in time, would the trellis be.
Timber base
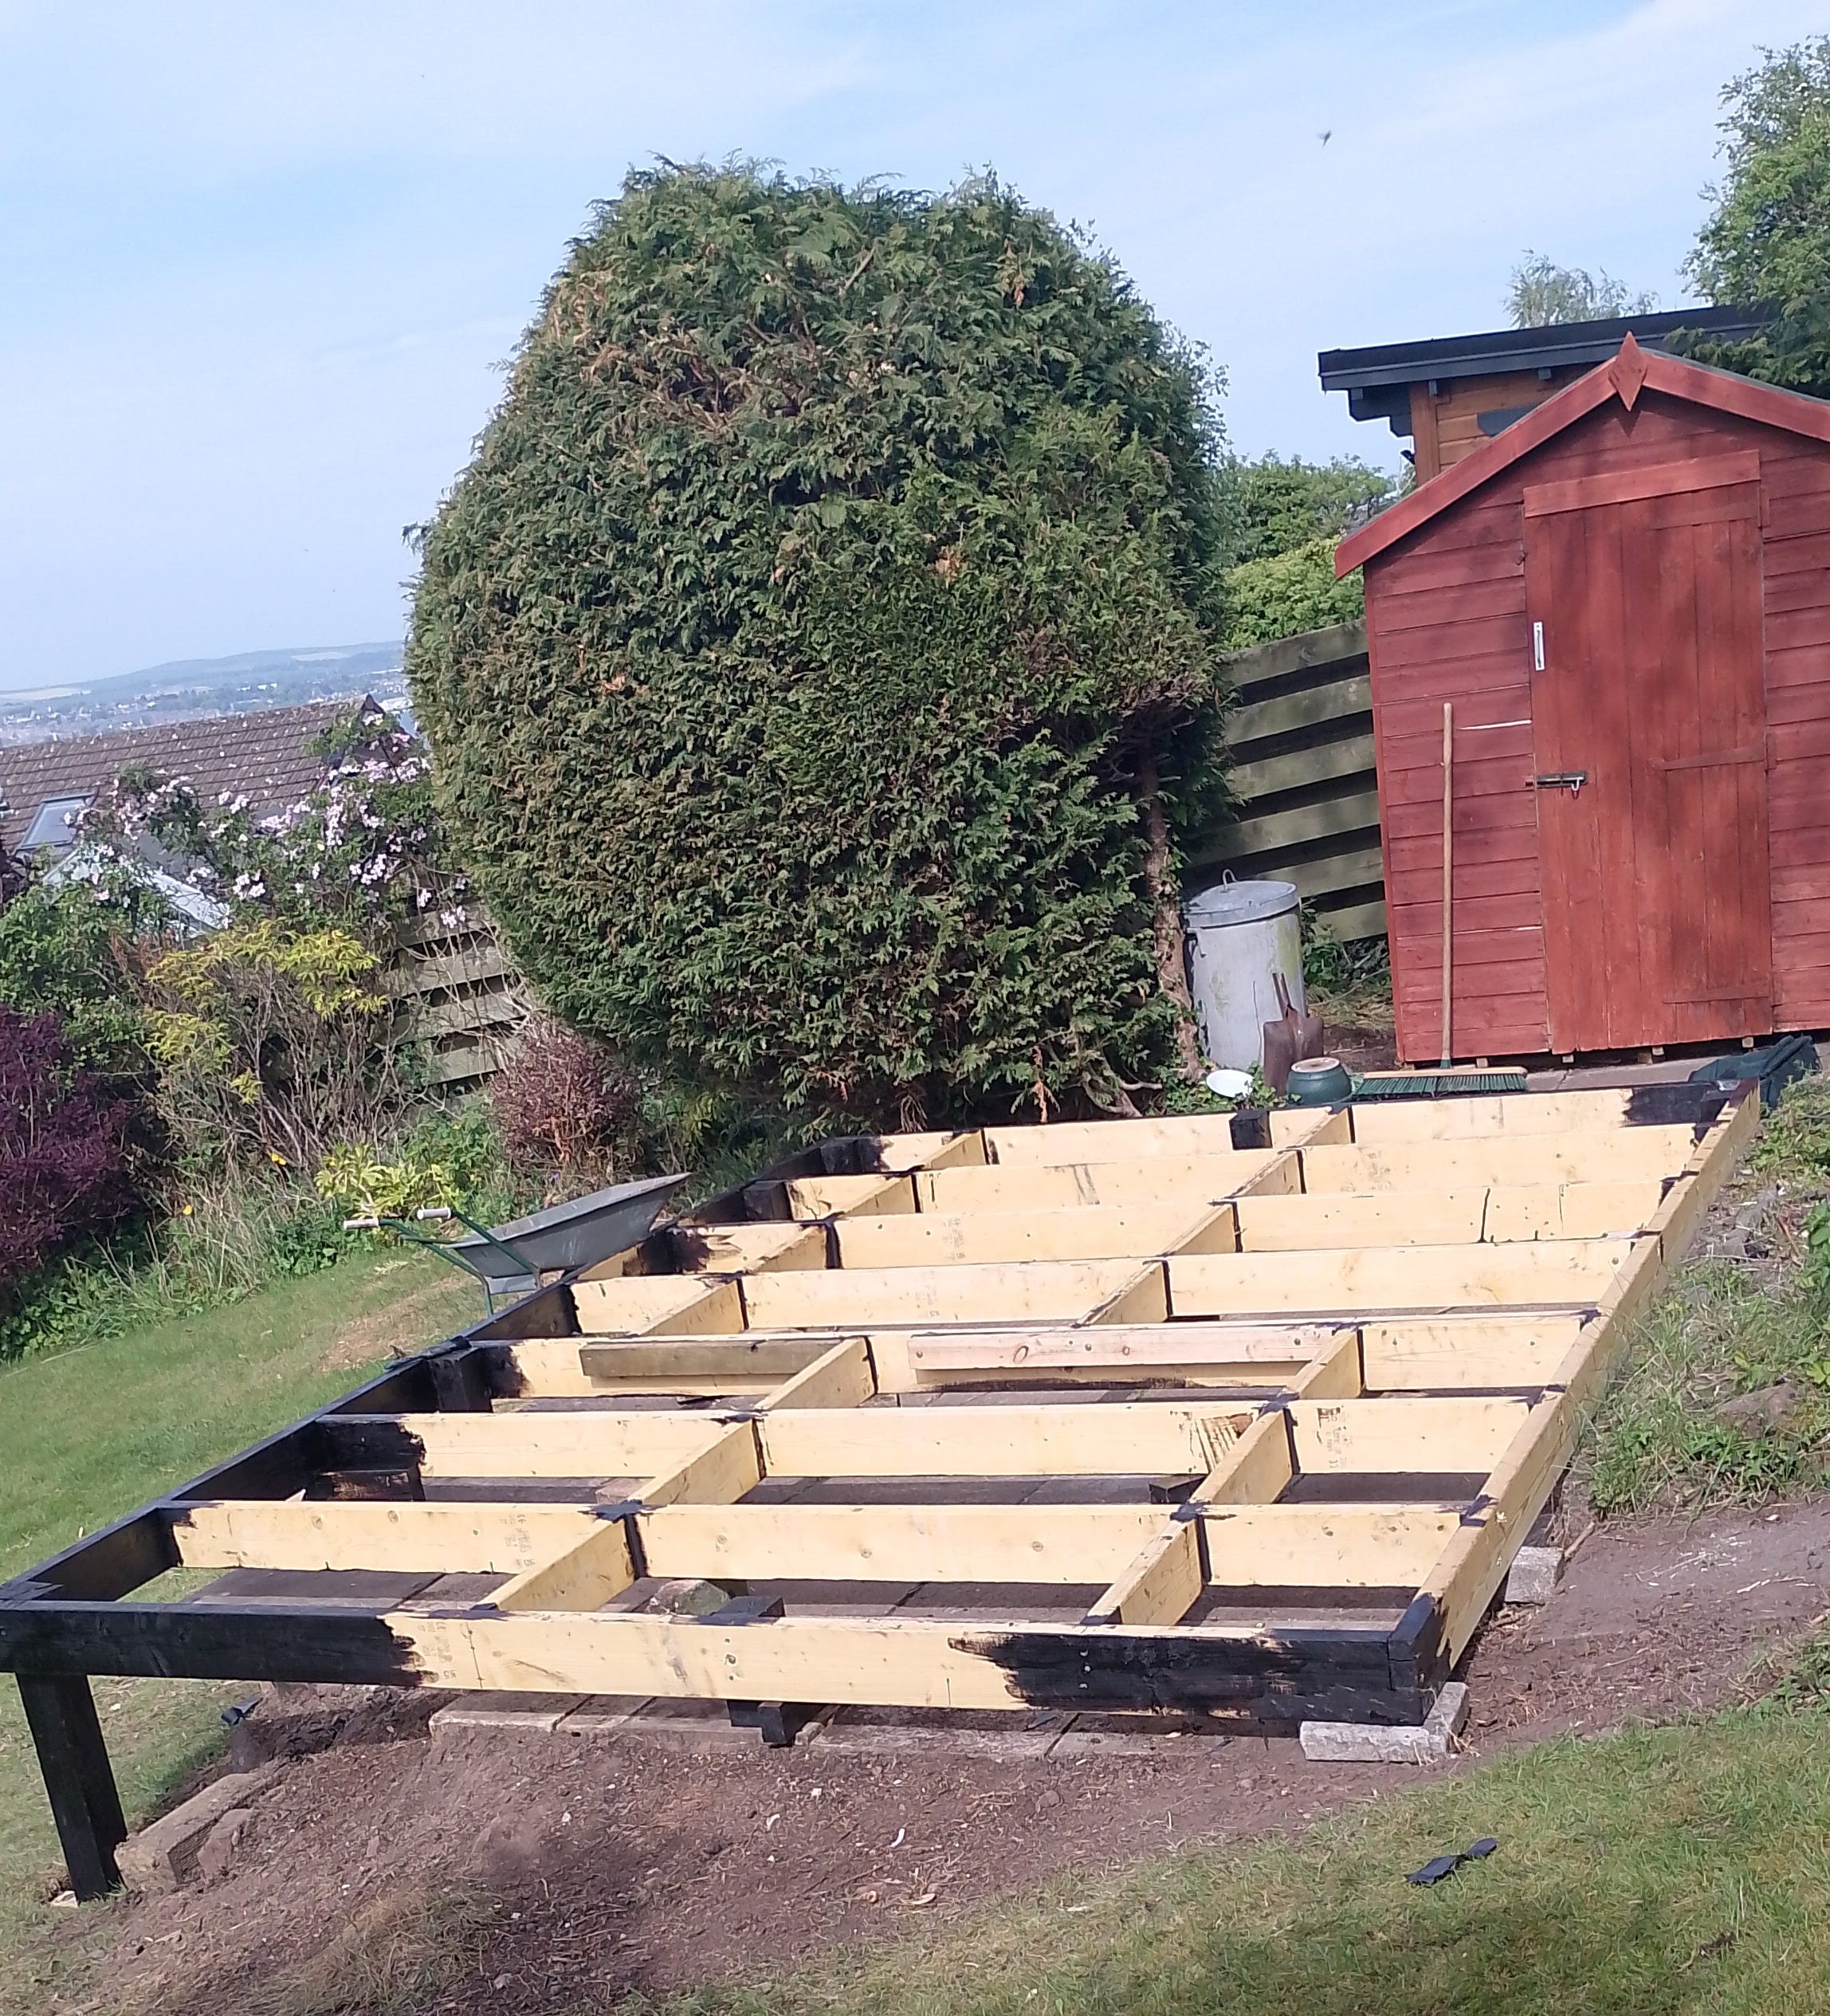
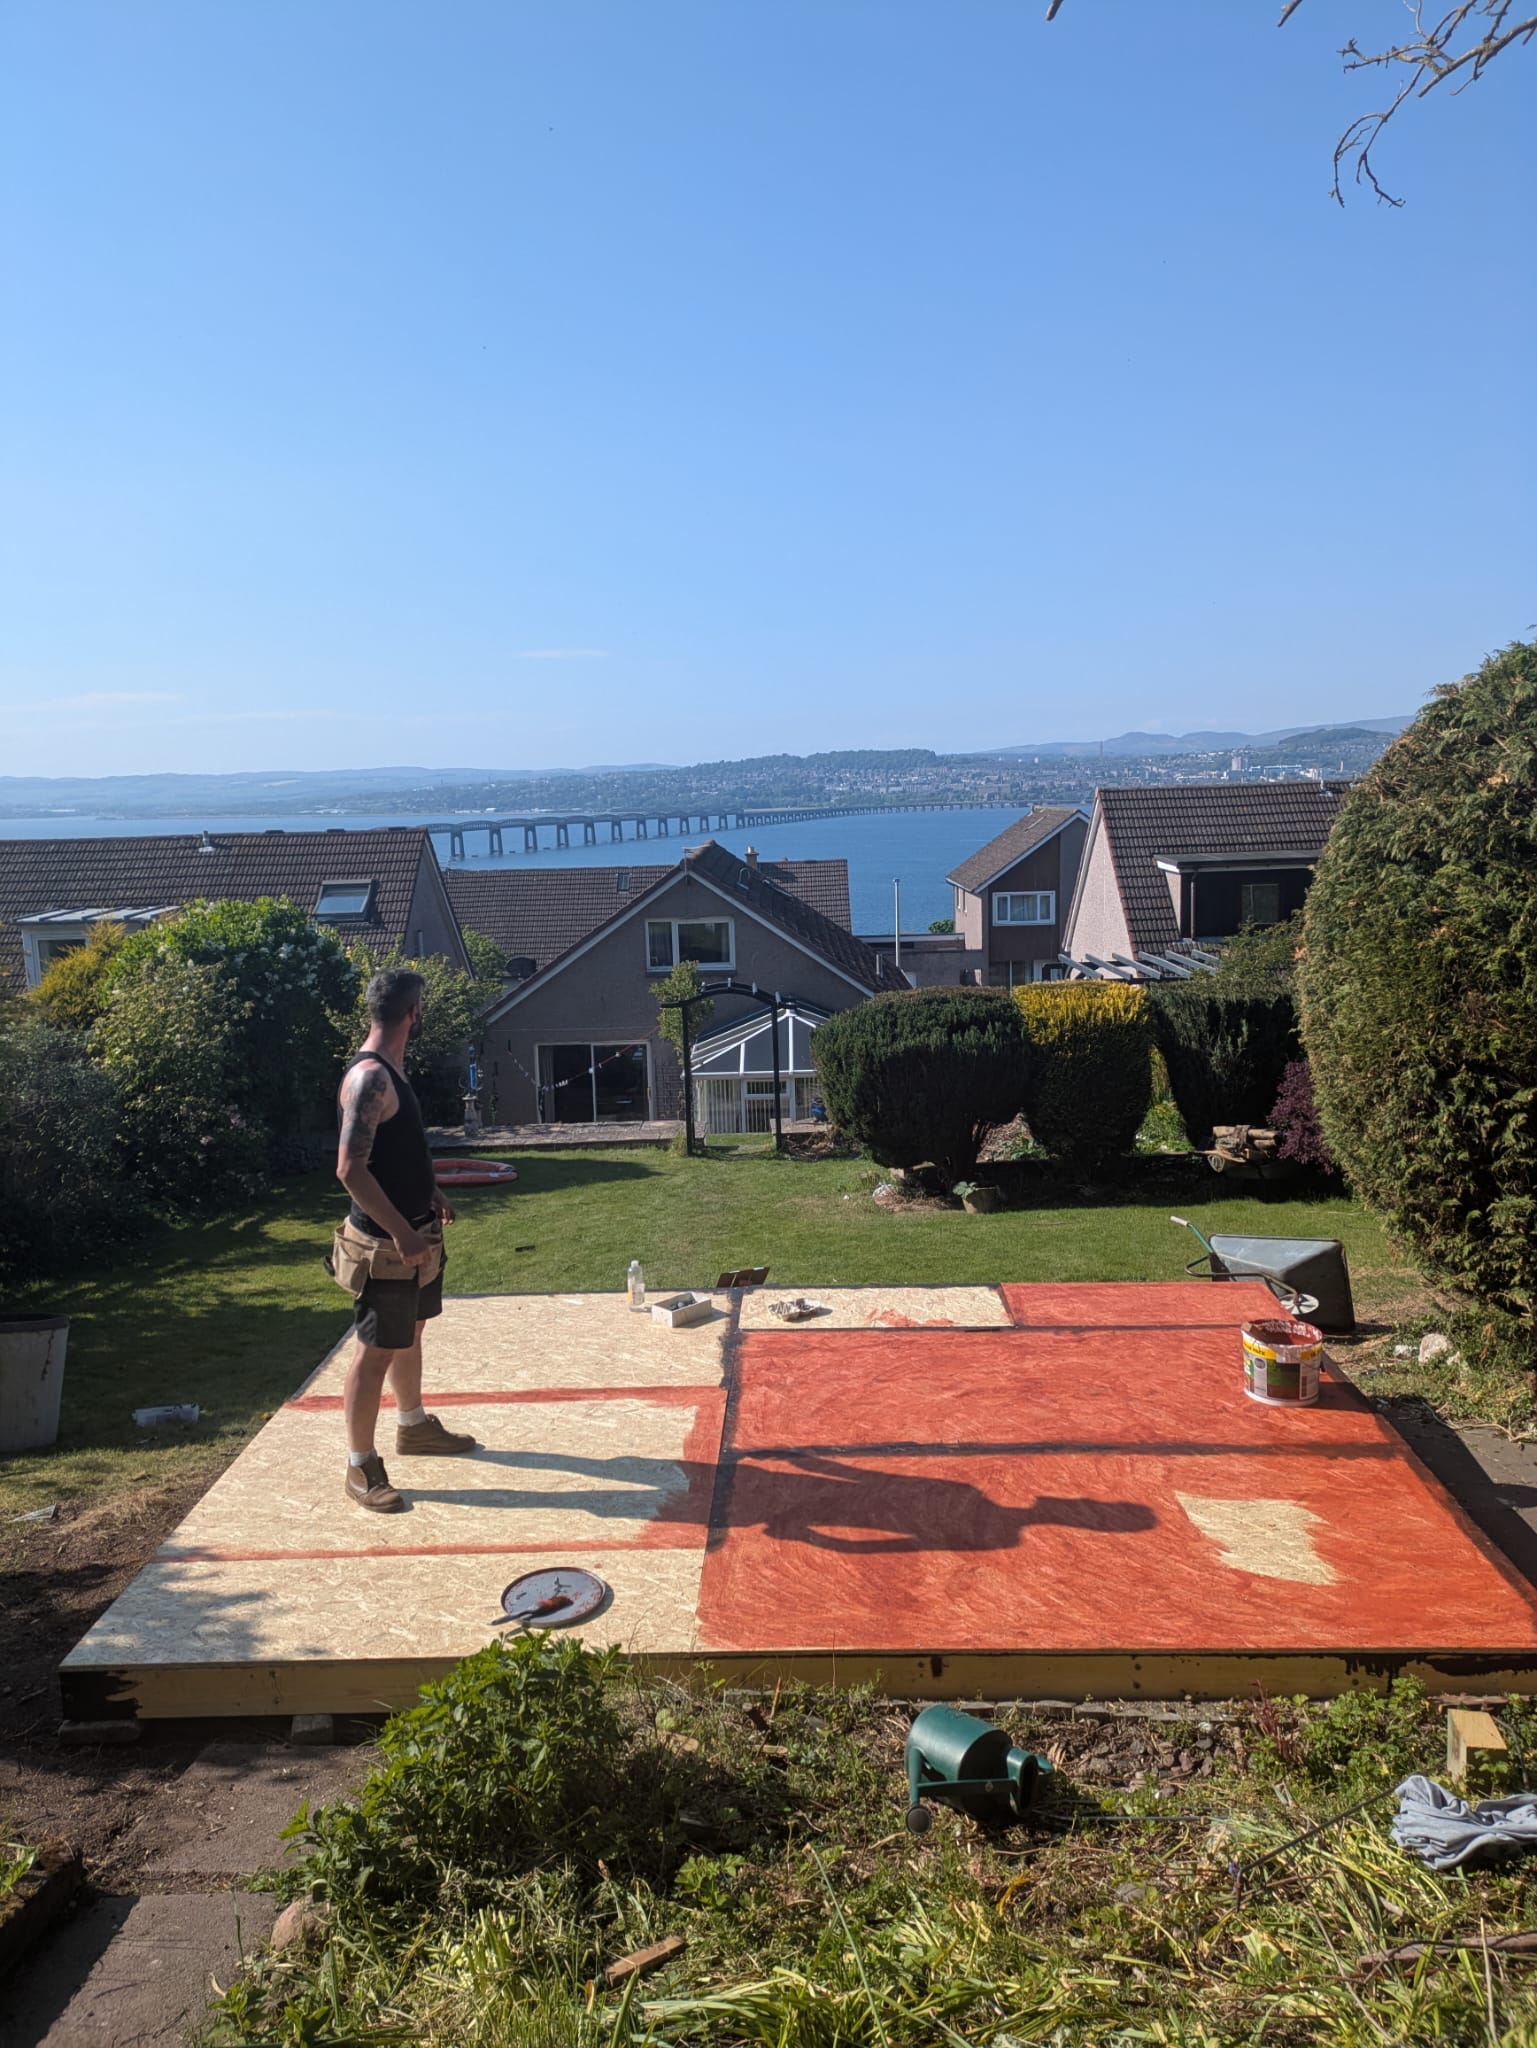
The weather was glorious during this time, so I painted in my home studio early and spent the afternoon outside constructing the base. I used 2x6m pressure treated timbers - squared with posts and bricks. One corner on the steep decline was anchored a metre or so into the ground with concrete.
I made the base slightly bigger than the planned cabin. I guessed it was better being slightly larger than smaller and this size helped keep all the dimensions universal meaning less cutting. I bought some 18 mm OSB boards to top the base - ready for the new structure.
Log Cabin Build
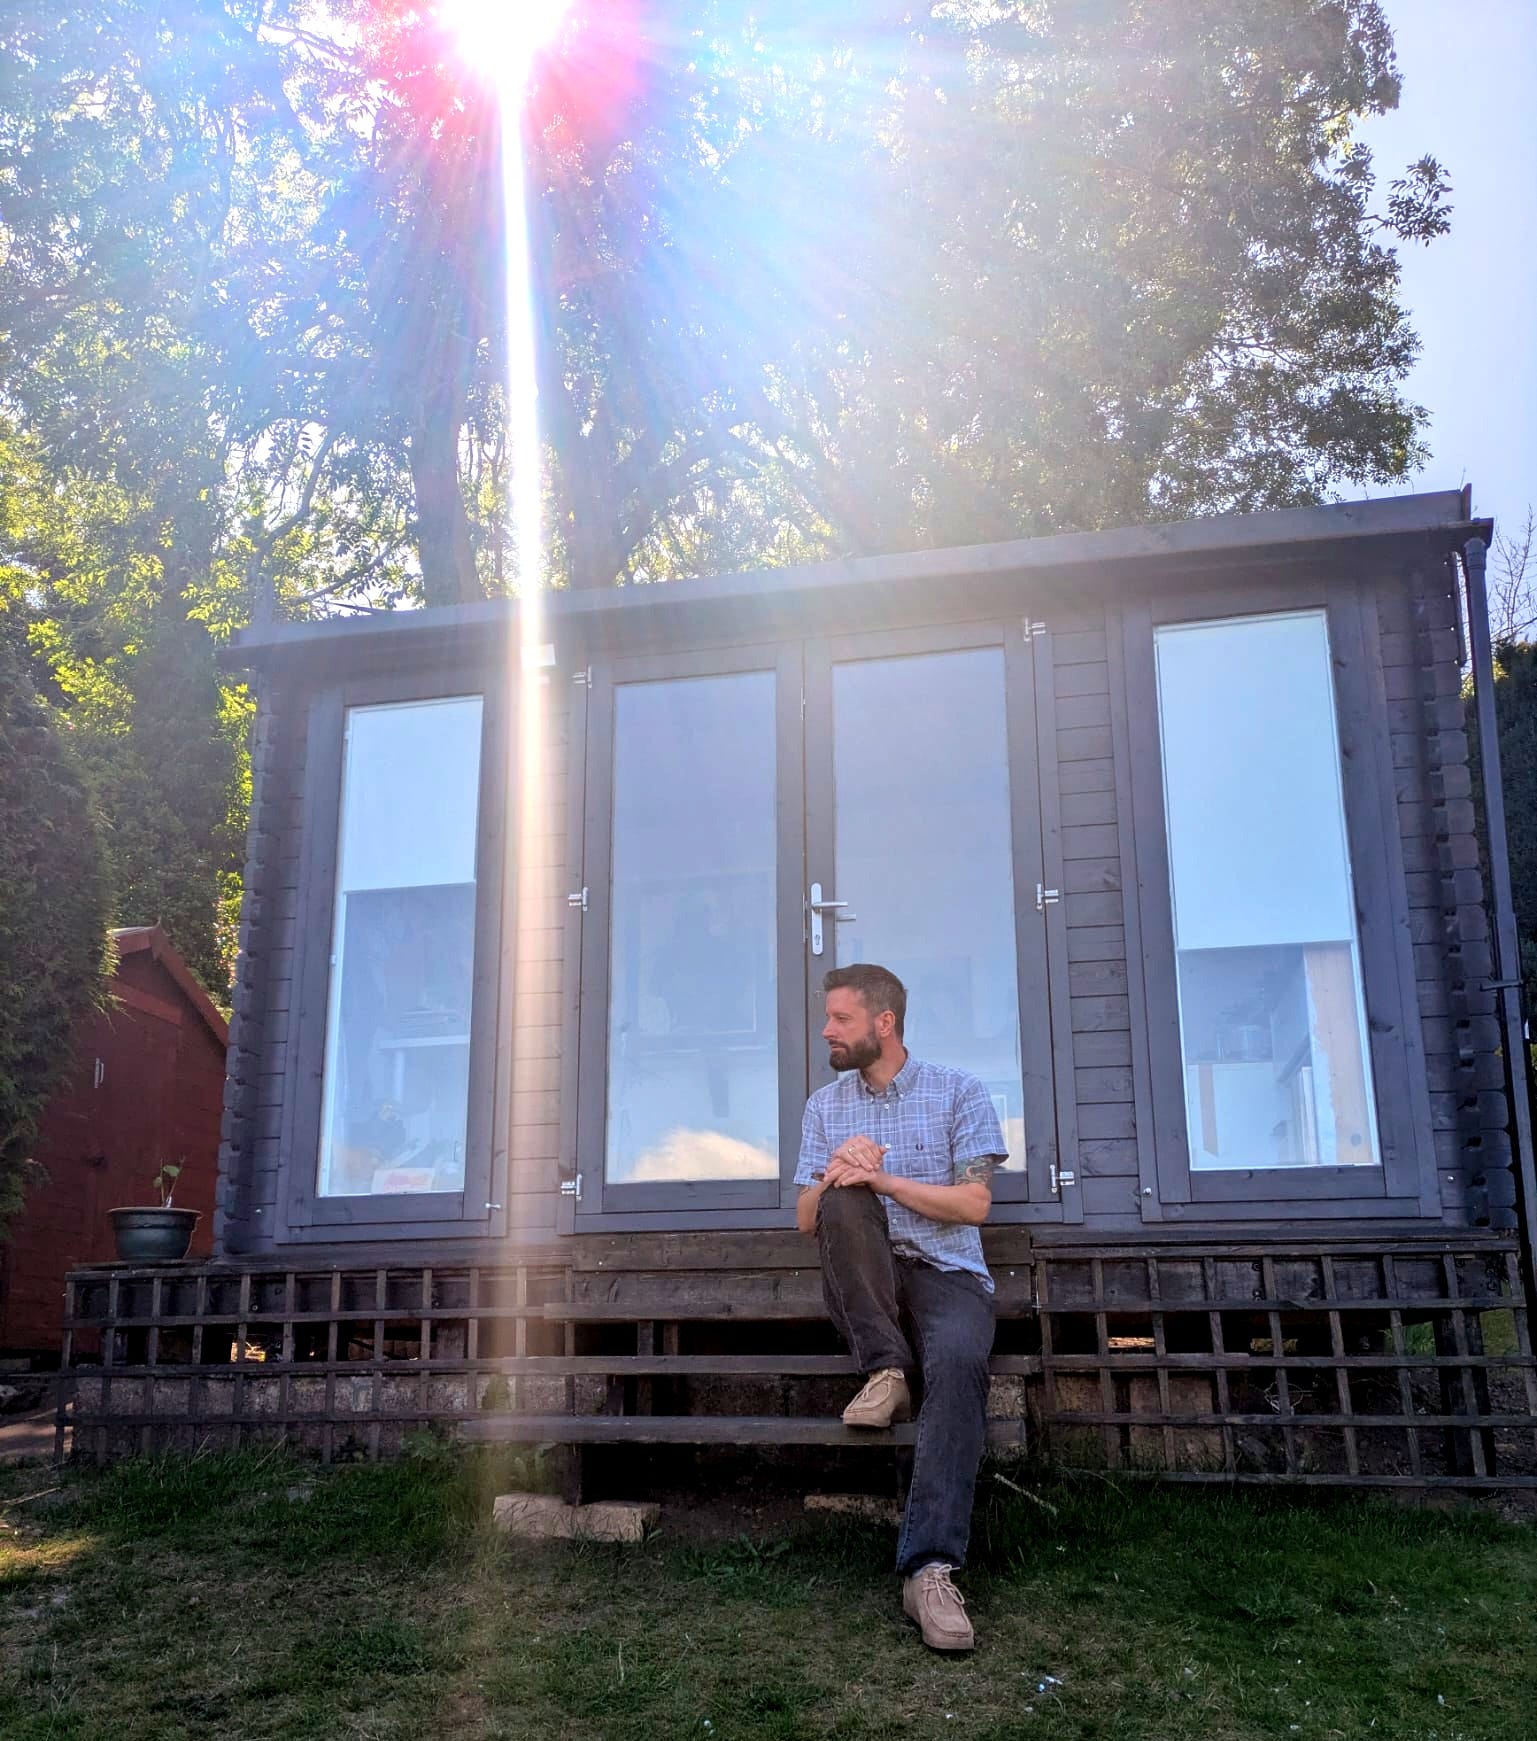
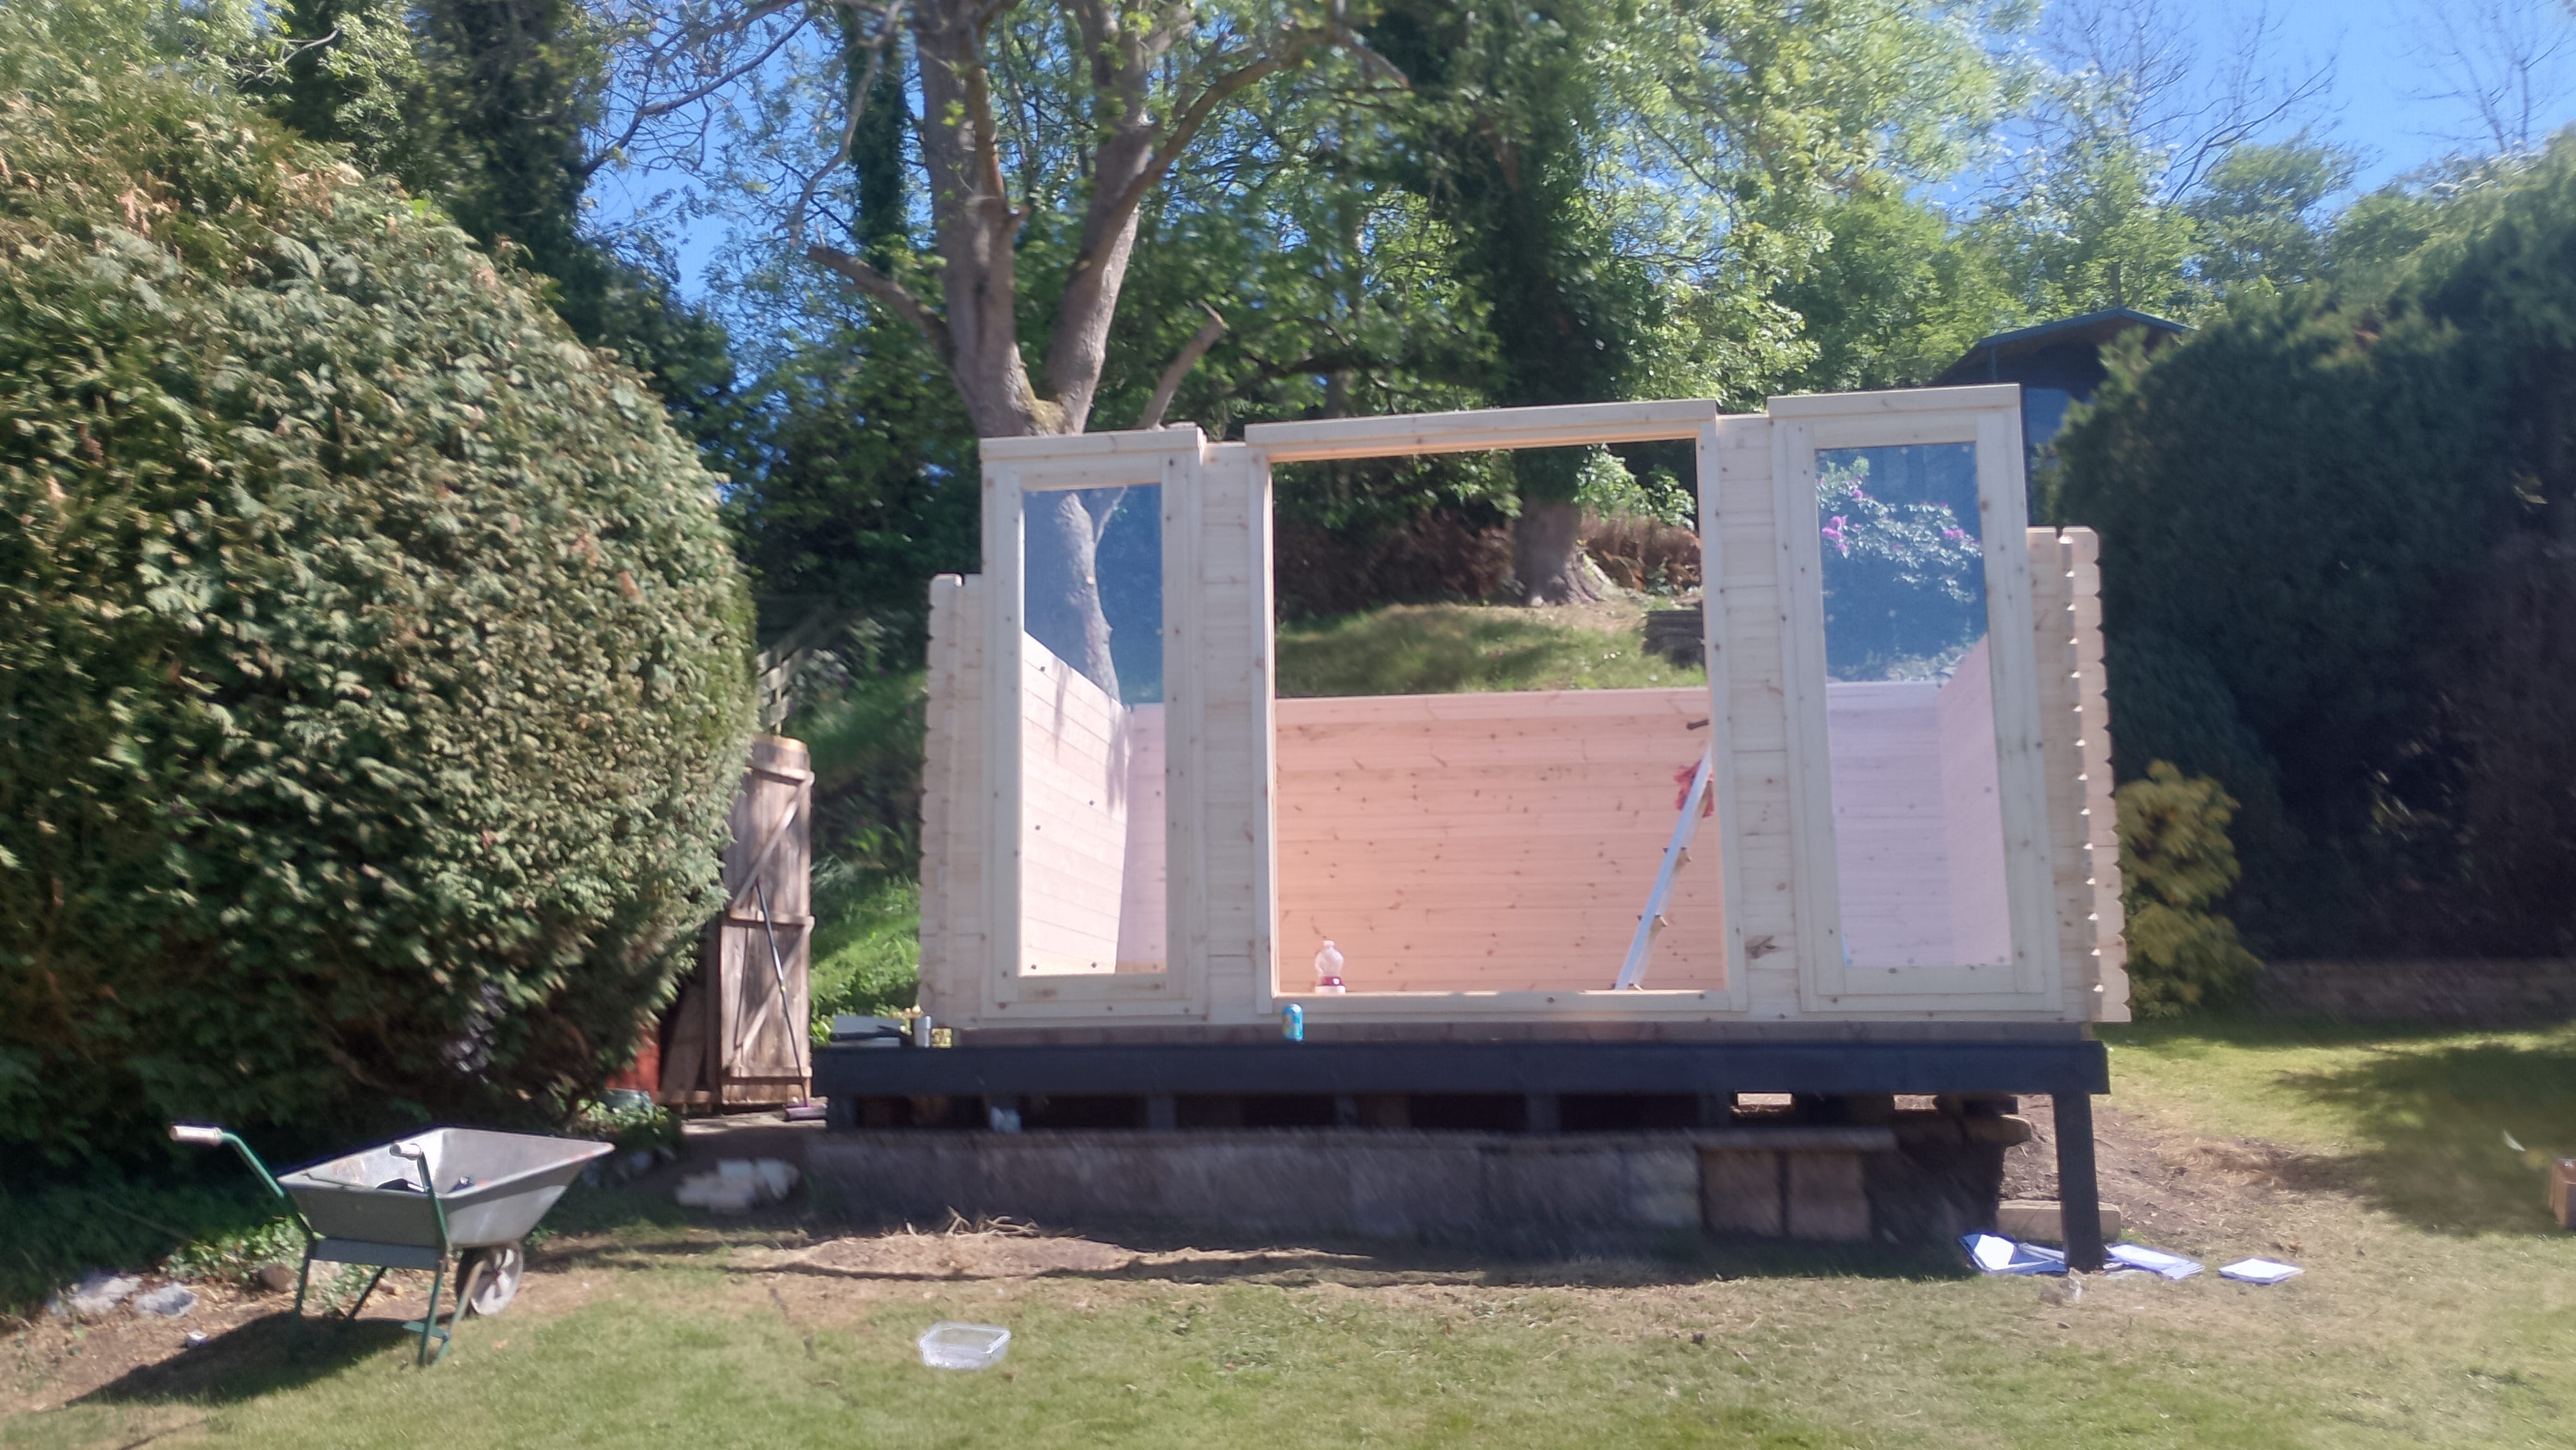
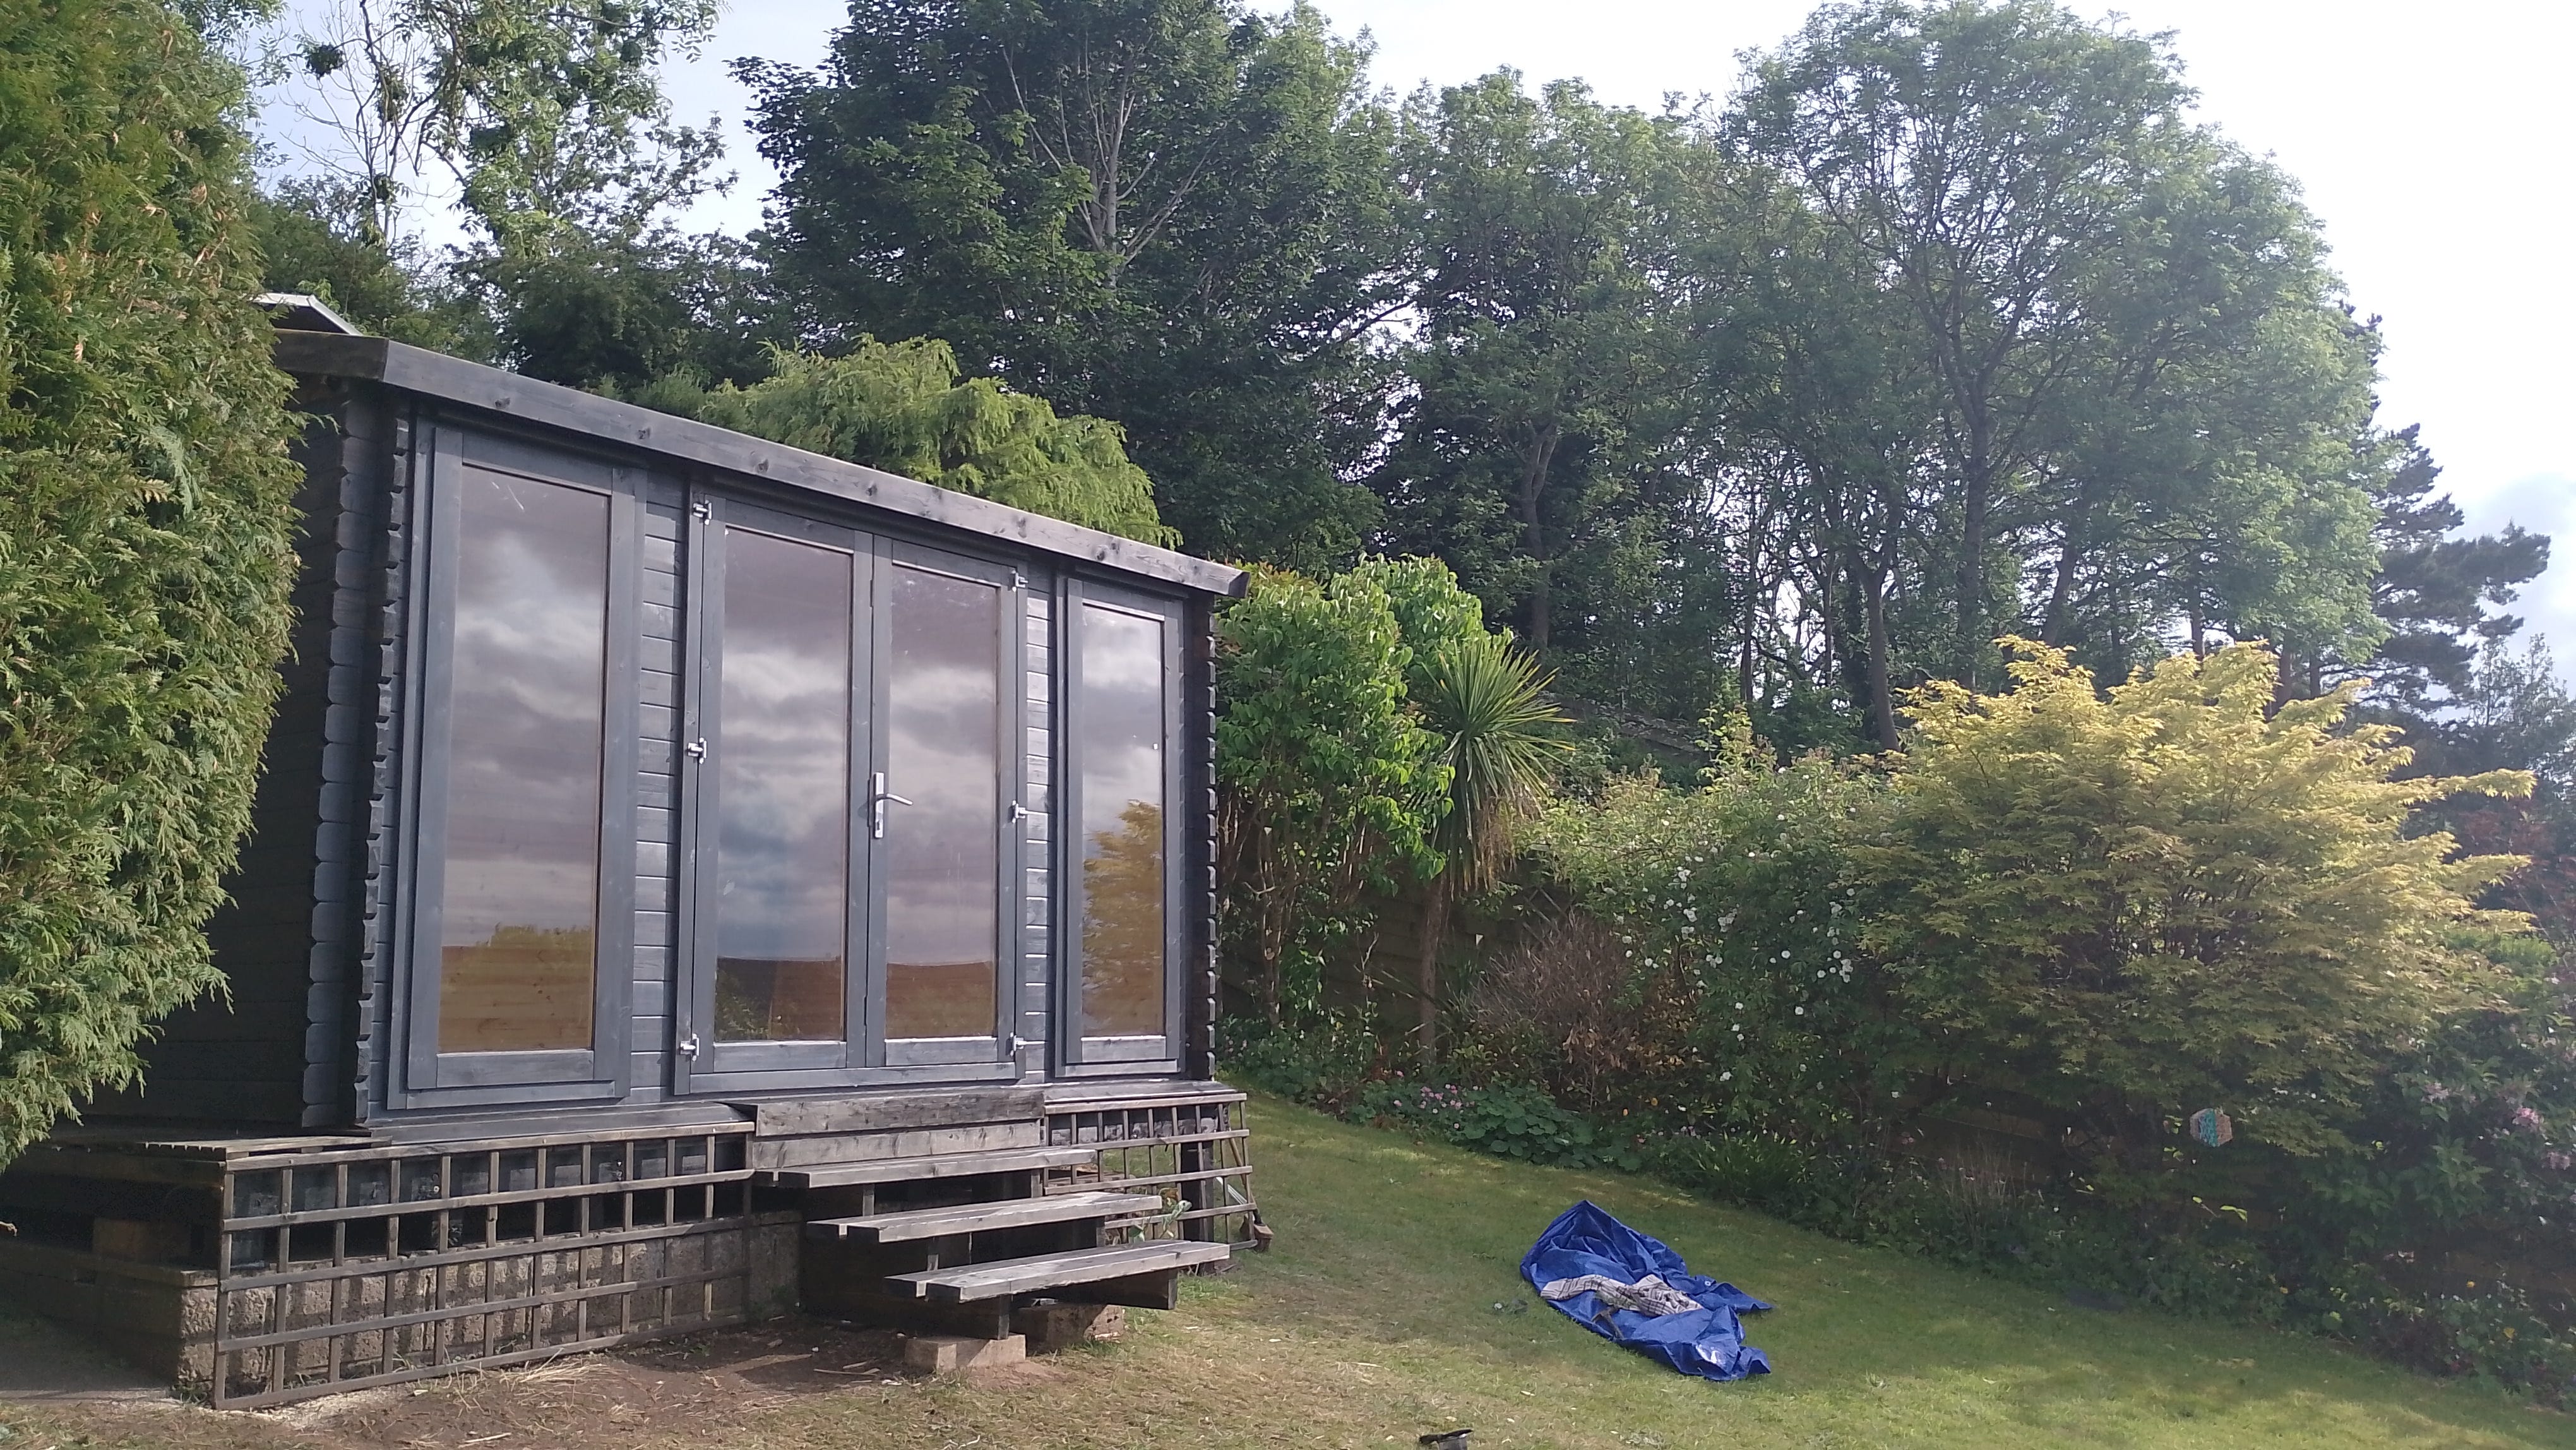
When it came to buying the cabin, I spent hours researching the various options until settling on what felt like the right one for me and my budget. It was 4x3m and 8ft high. The front had large full sized double glazed windows and glass doors which I planned to have north facing over the river view. The cabin was my biggest cost but I purchased it on a bank holiday sale which brought the it down a bit.

It was delivered a few weeks later - in several hundred pieces of timber, metal and glass. The quality looked good - and surpassed my expectations. My dad helped that weekend - the weather held and we managed to put the numerous pieces together over a couple of days.

Steps and trimming
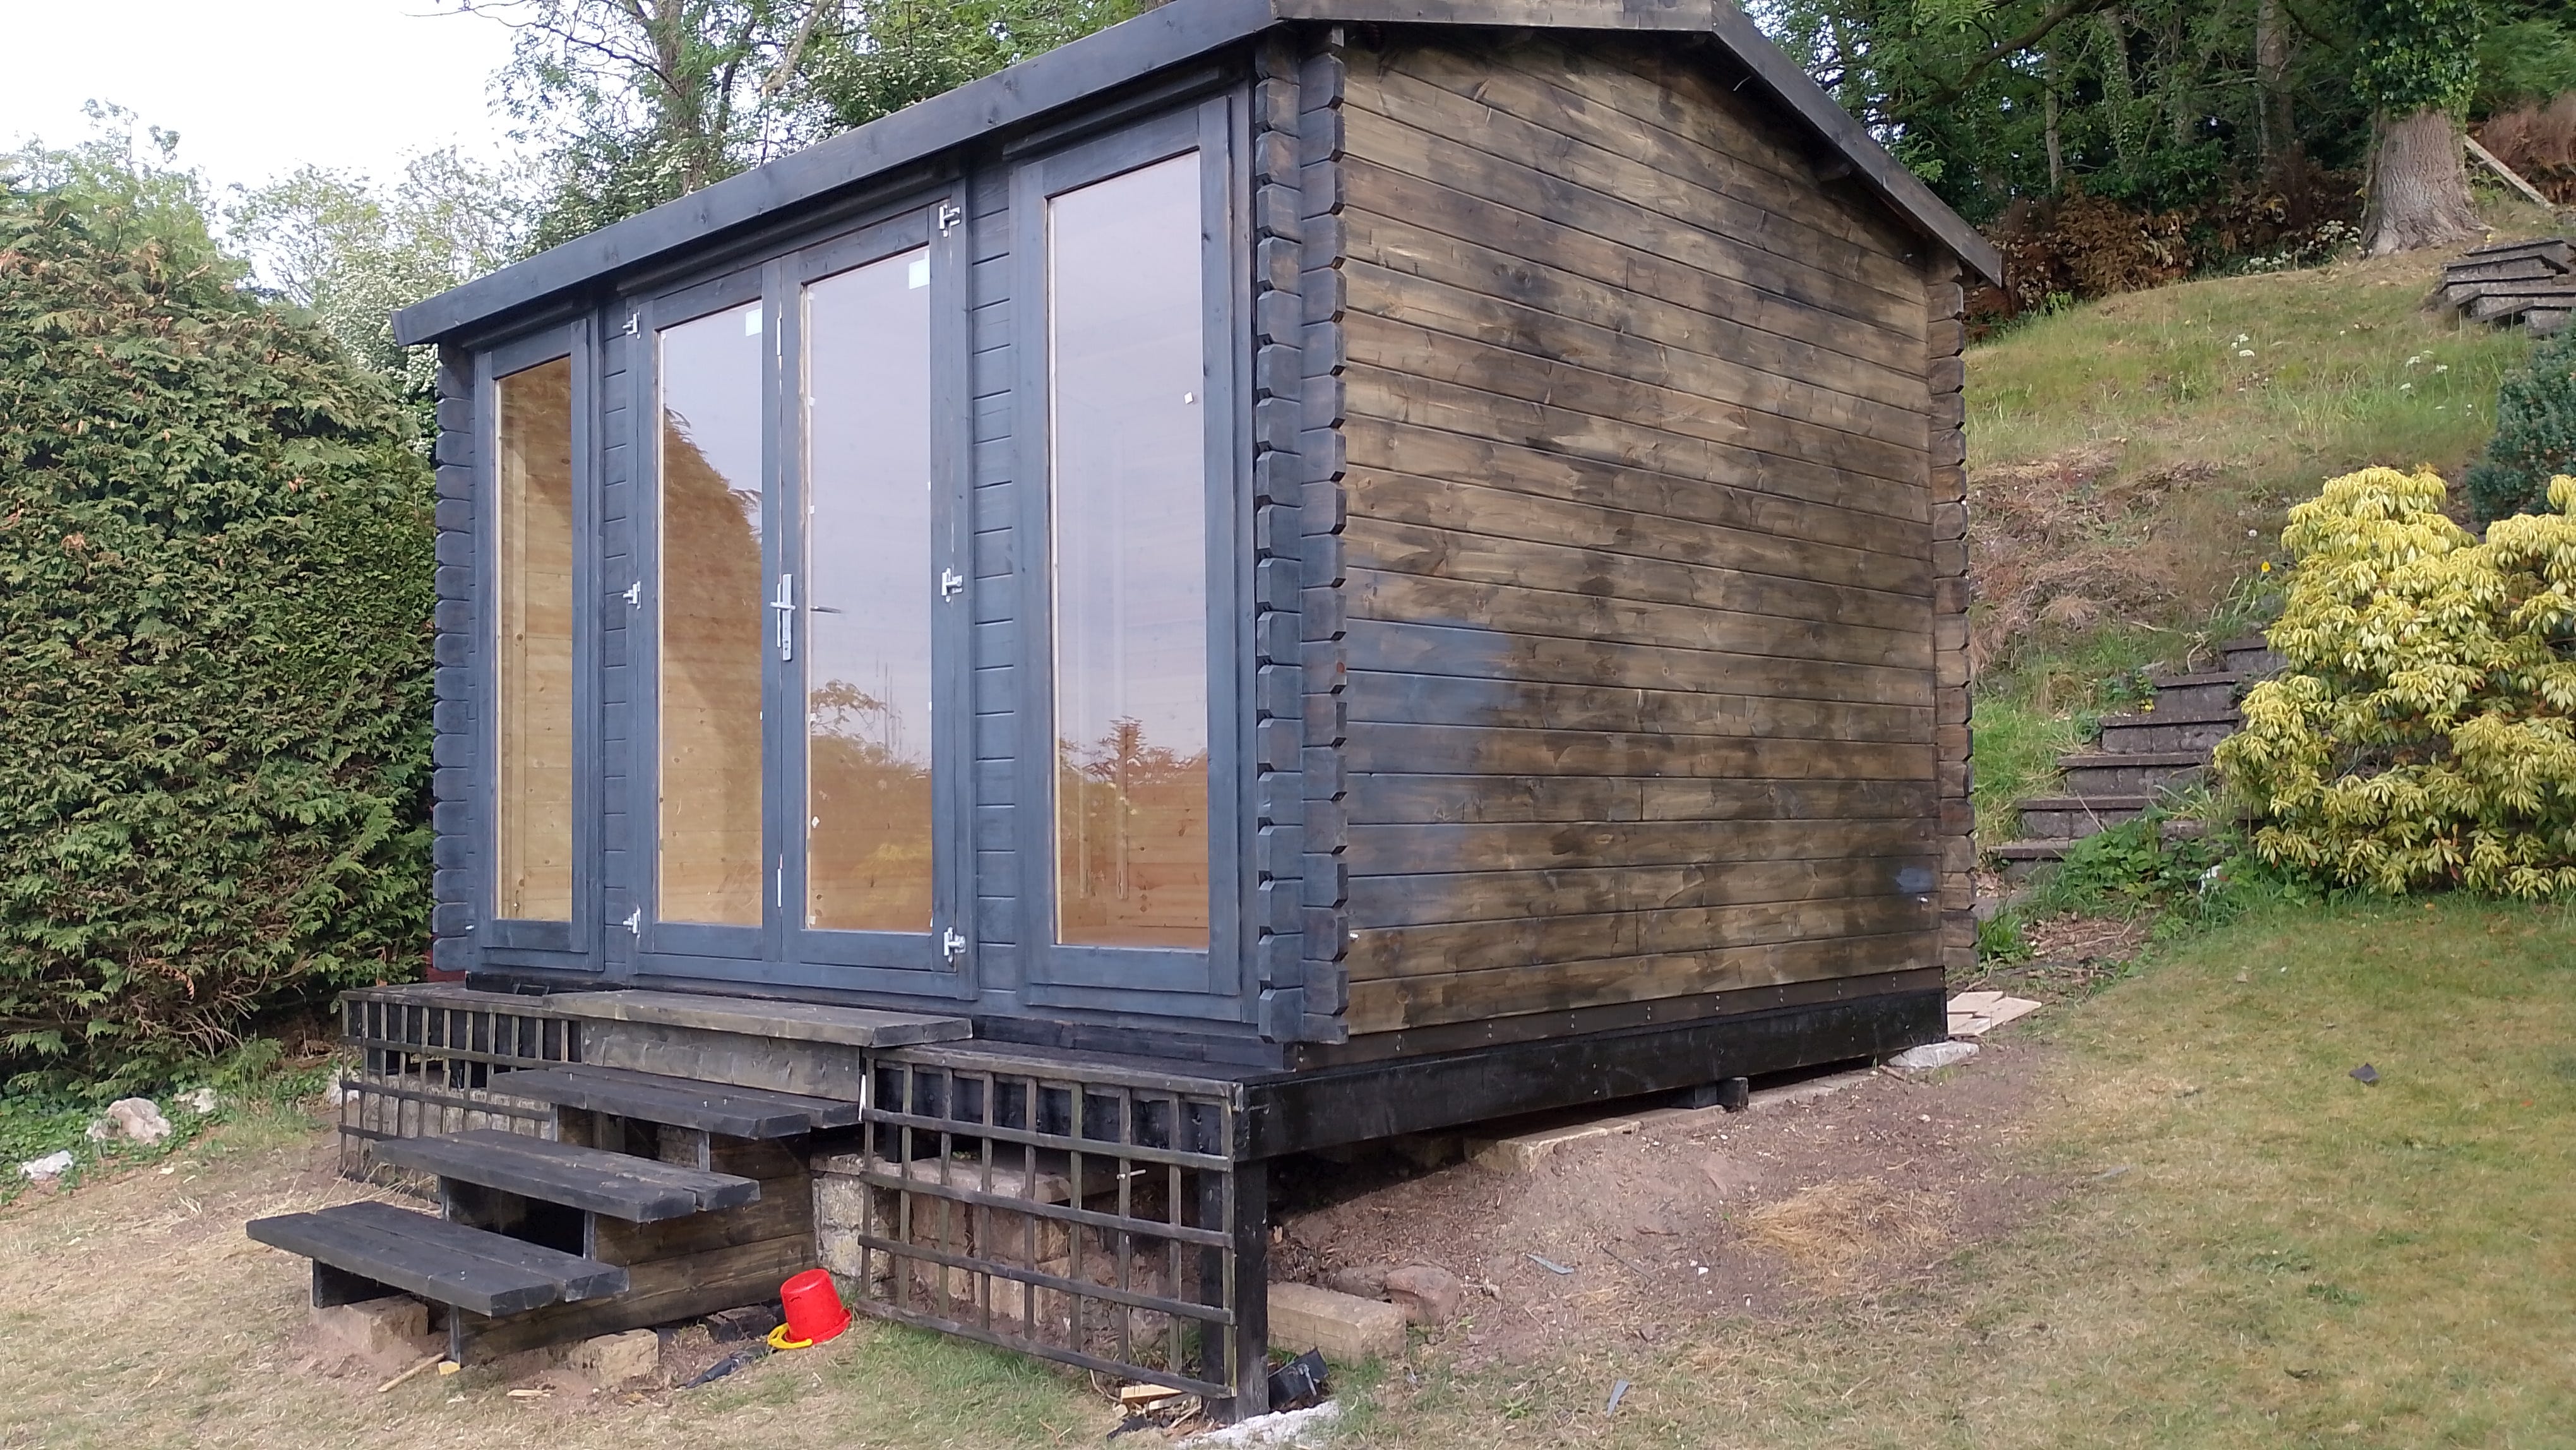
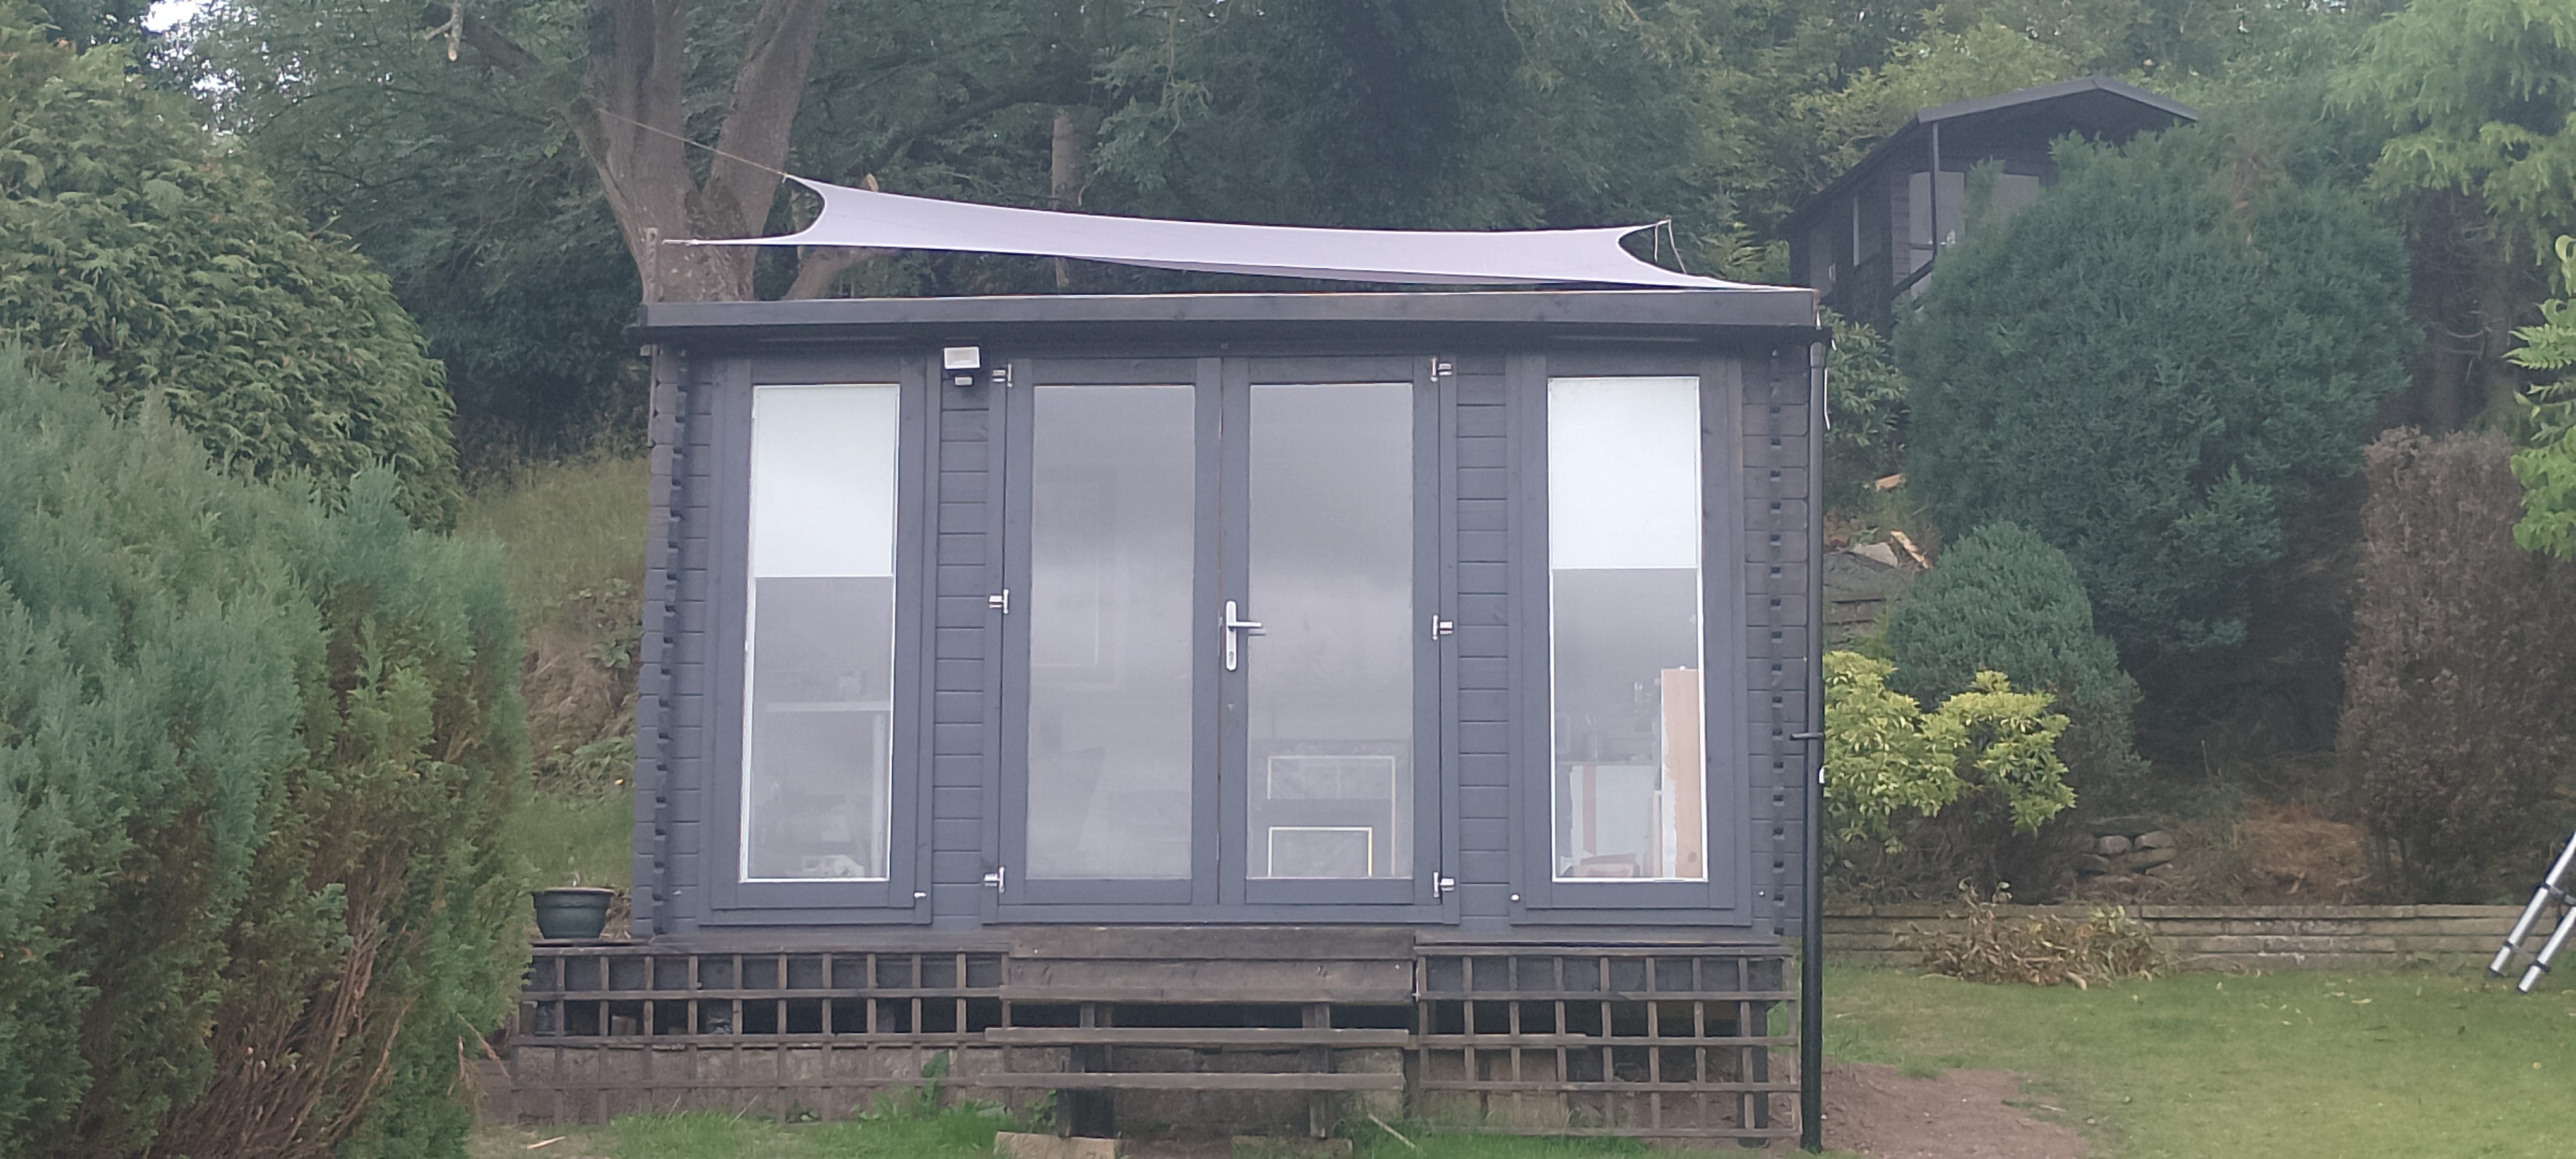
As I overestimated the size of base, there was some wood left open to the elements that required trimming. I was going to deck this area - but with the cost looking to be £200, I decided to visit a budget store and found some small decking squares for sale at £5 each. They fitted perfectly. I build some much needed steps with the base offcuts and trimmed under the windows the with spare floorboards. You can see from the photograph that the trellis was indeed utilised to hide the old patio wall.
Water proofing
The weather finally changed and I was very eager to seal everything and get the guttering up - a mad race against the elements. Six weeks of glorious weather in Scotland usually means six weeks of torrential rain is on the way!
I sealed every exterior part of the cabin with a preserver then waterproofed with a charcoal blue outdoor paint. Then I then added the guttering strip to the front with spare parts I had left from previous projects. I sealed any vulnerable areas with some free damp proof membrane acquired from my brother and copious amounts of silicone.
The building really came to life after painting it. And when sitting at the bottom of the garden looking up, the large windows reflect the river and sky which is beautiful especially in the late evening when the pink and oranges of evening sunsets are mirrored.
Electricity
I found a young local electrician online who was starting off his trade - so managed to get a good price considering the distance from the main power supply. I dug the cable trench to keep costs down He fitted a security light, two light fittings and 2 double sockets and a spare unit for future use.
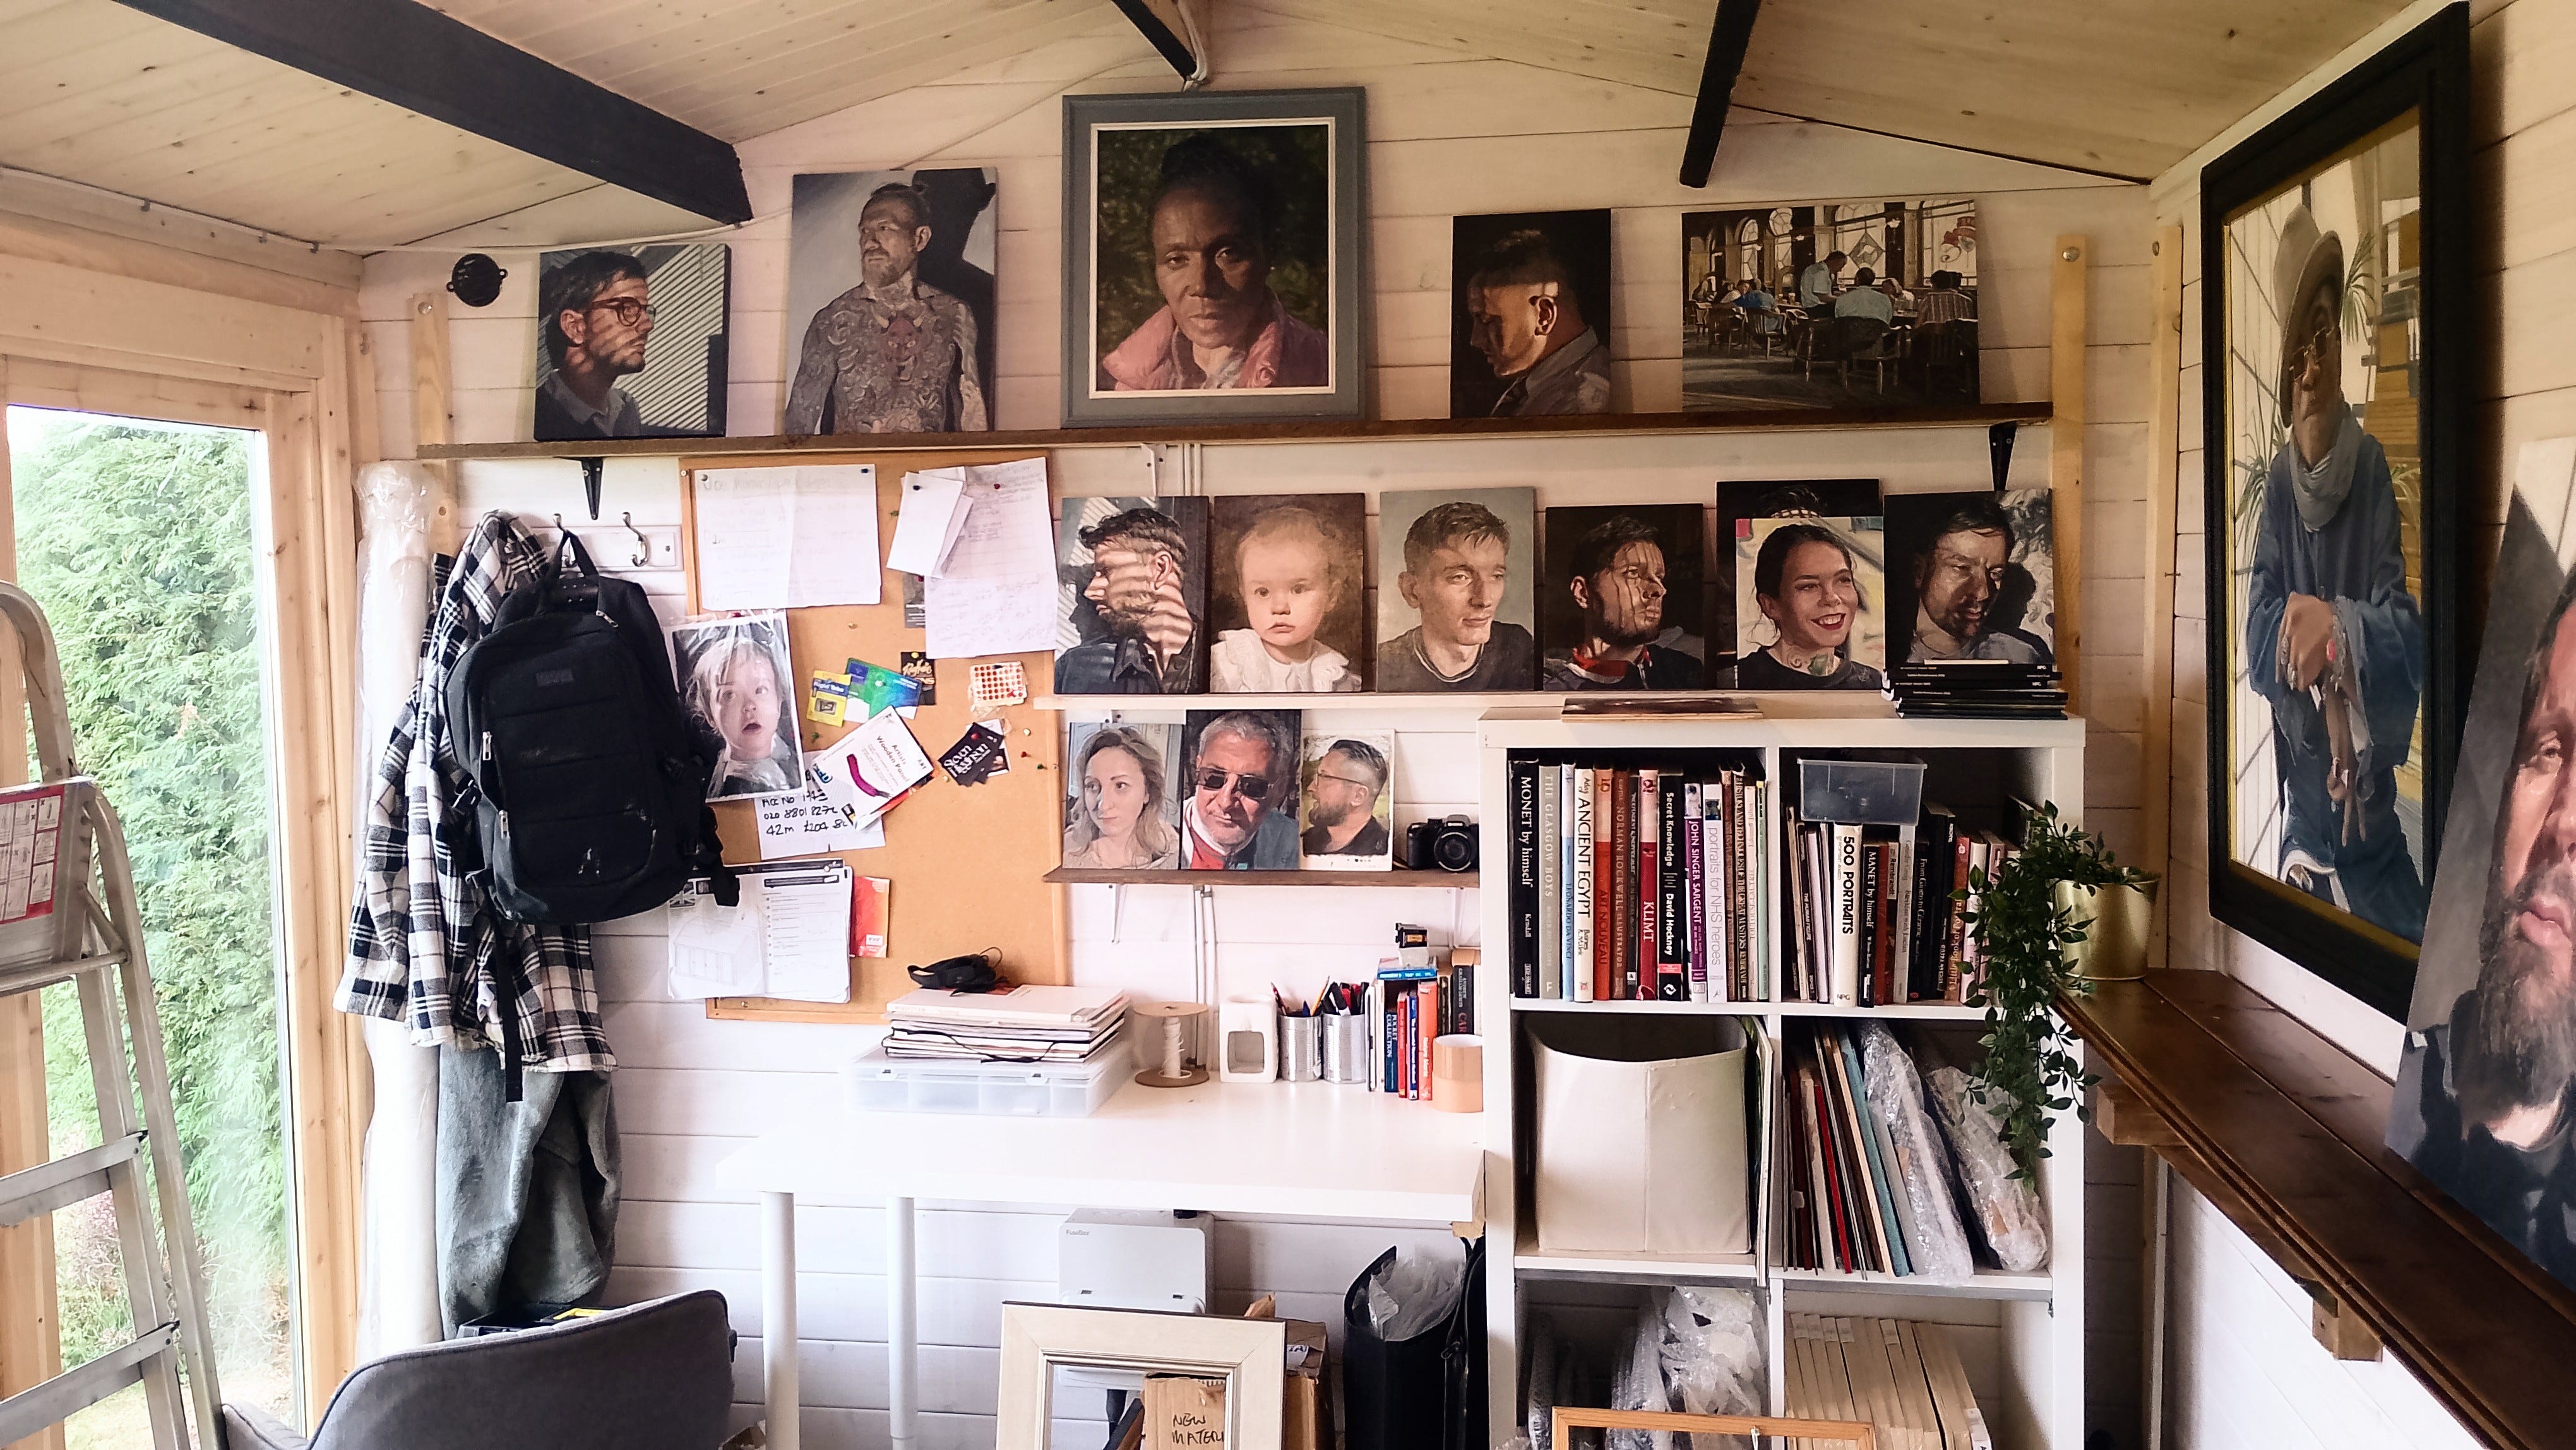
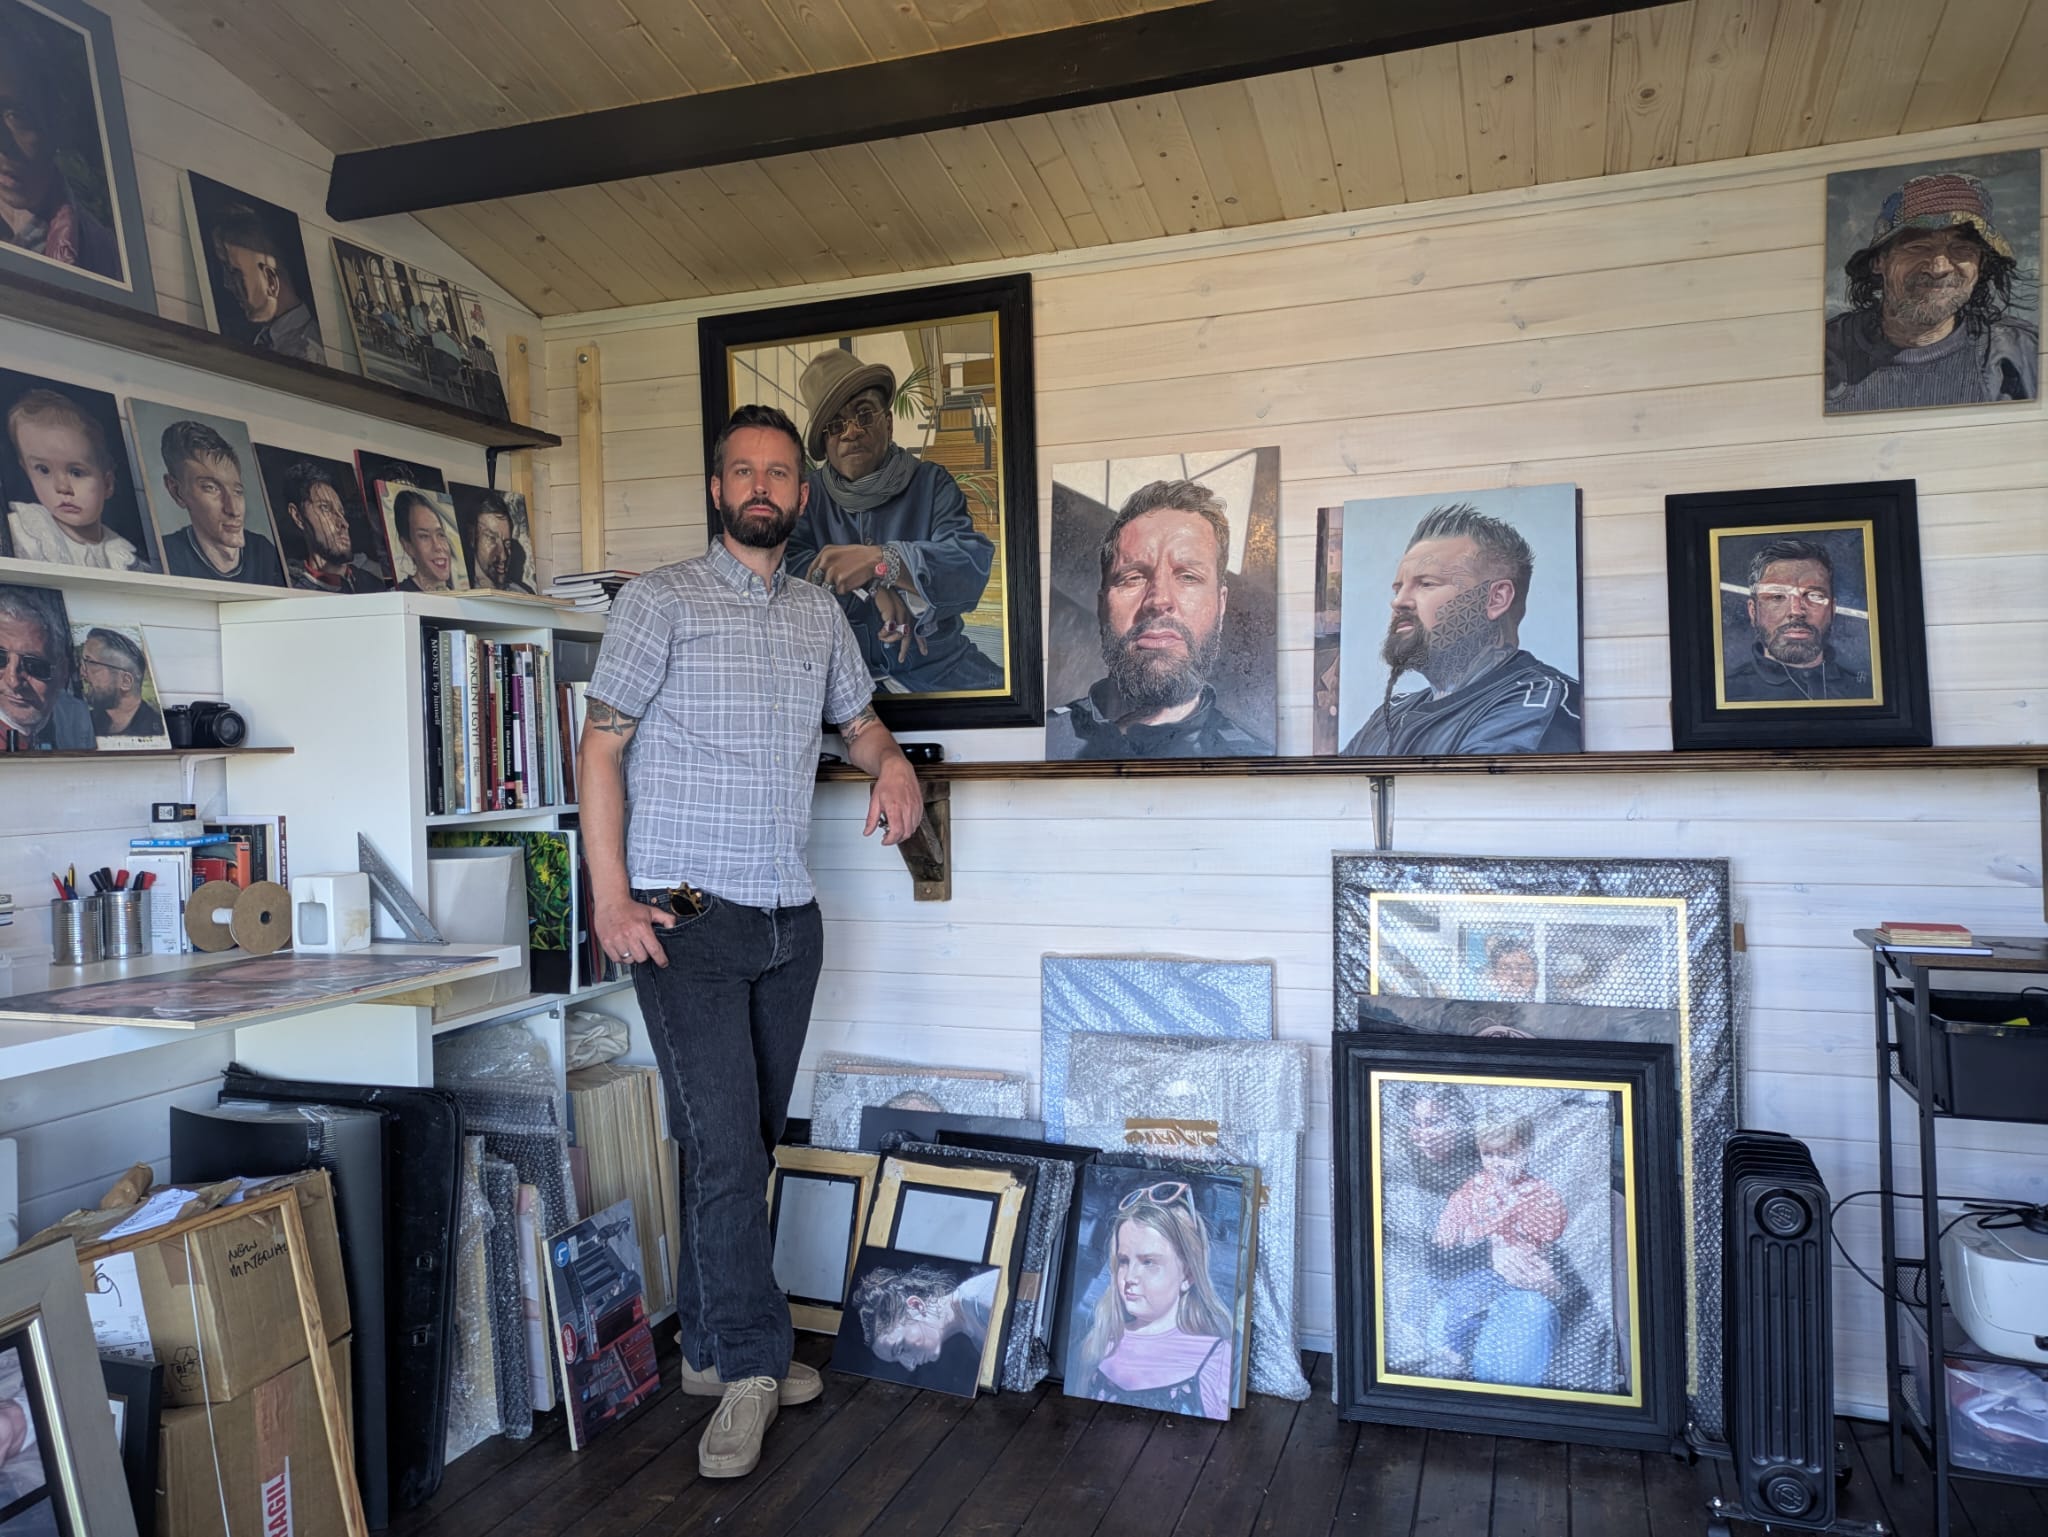
7. Interior
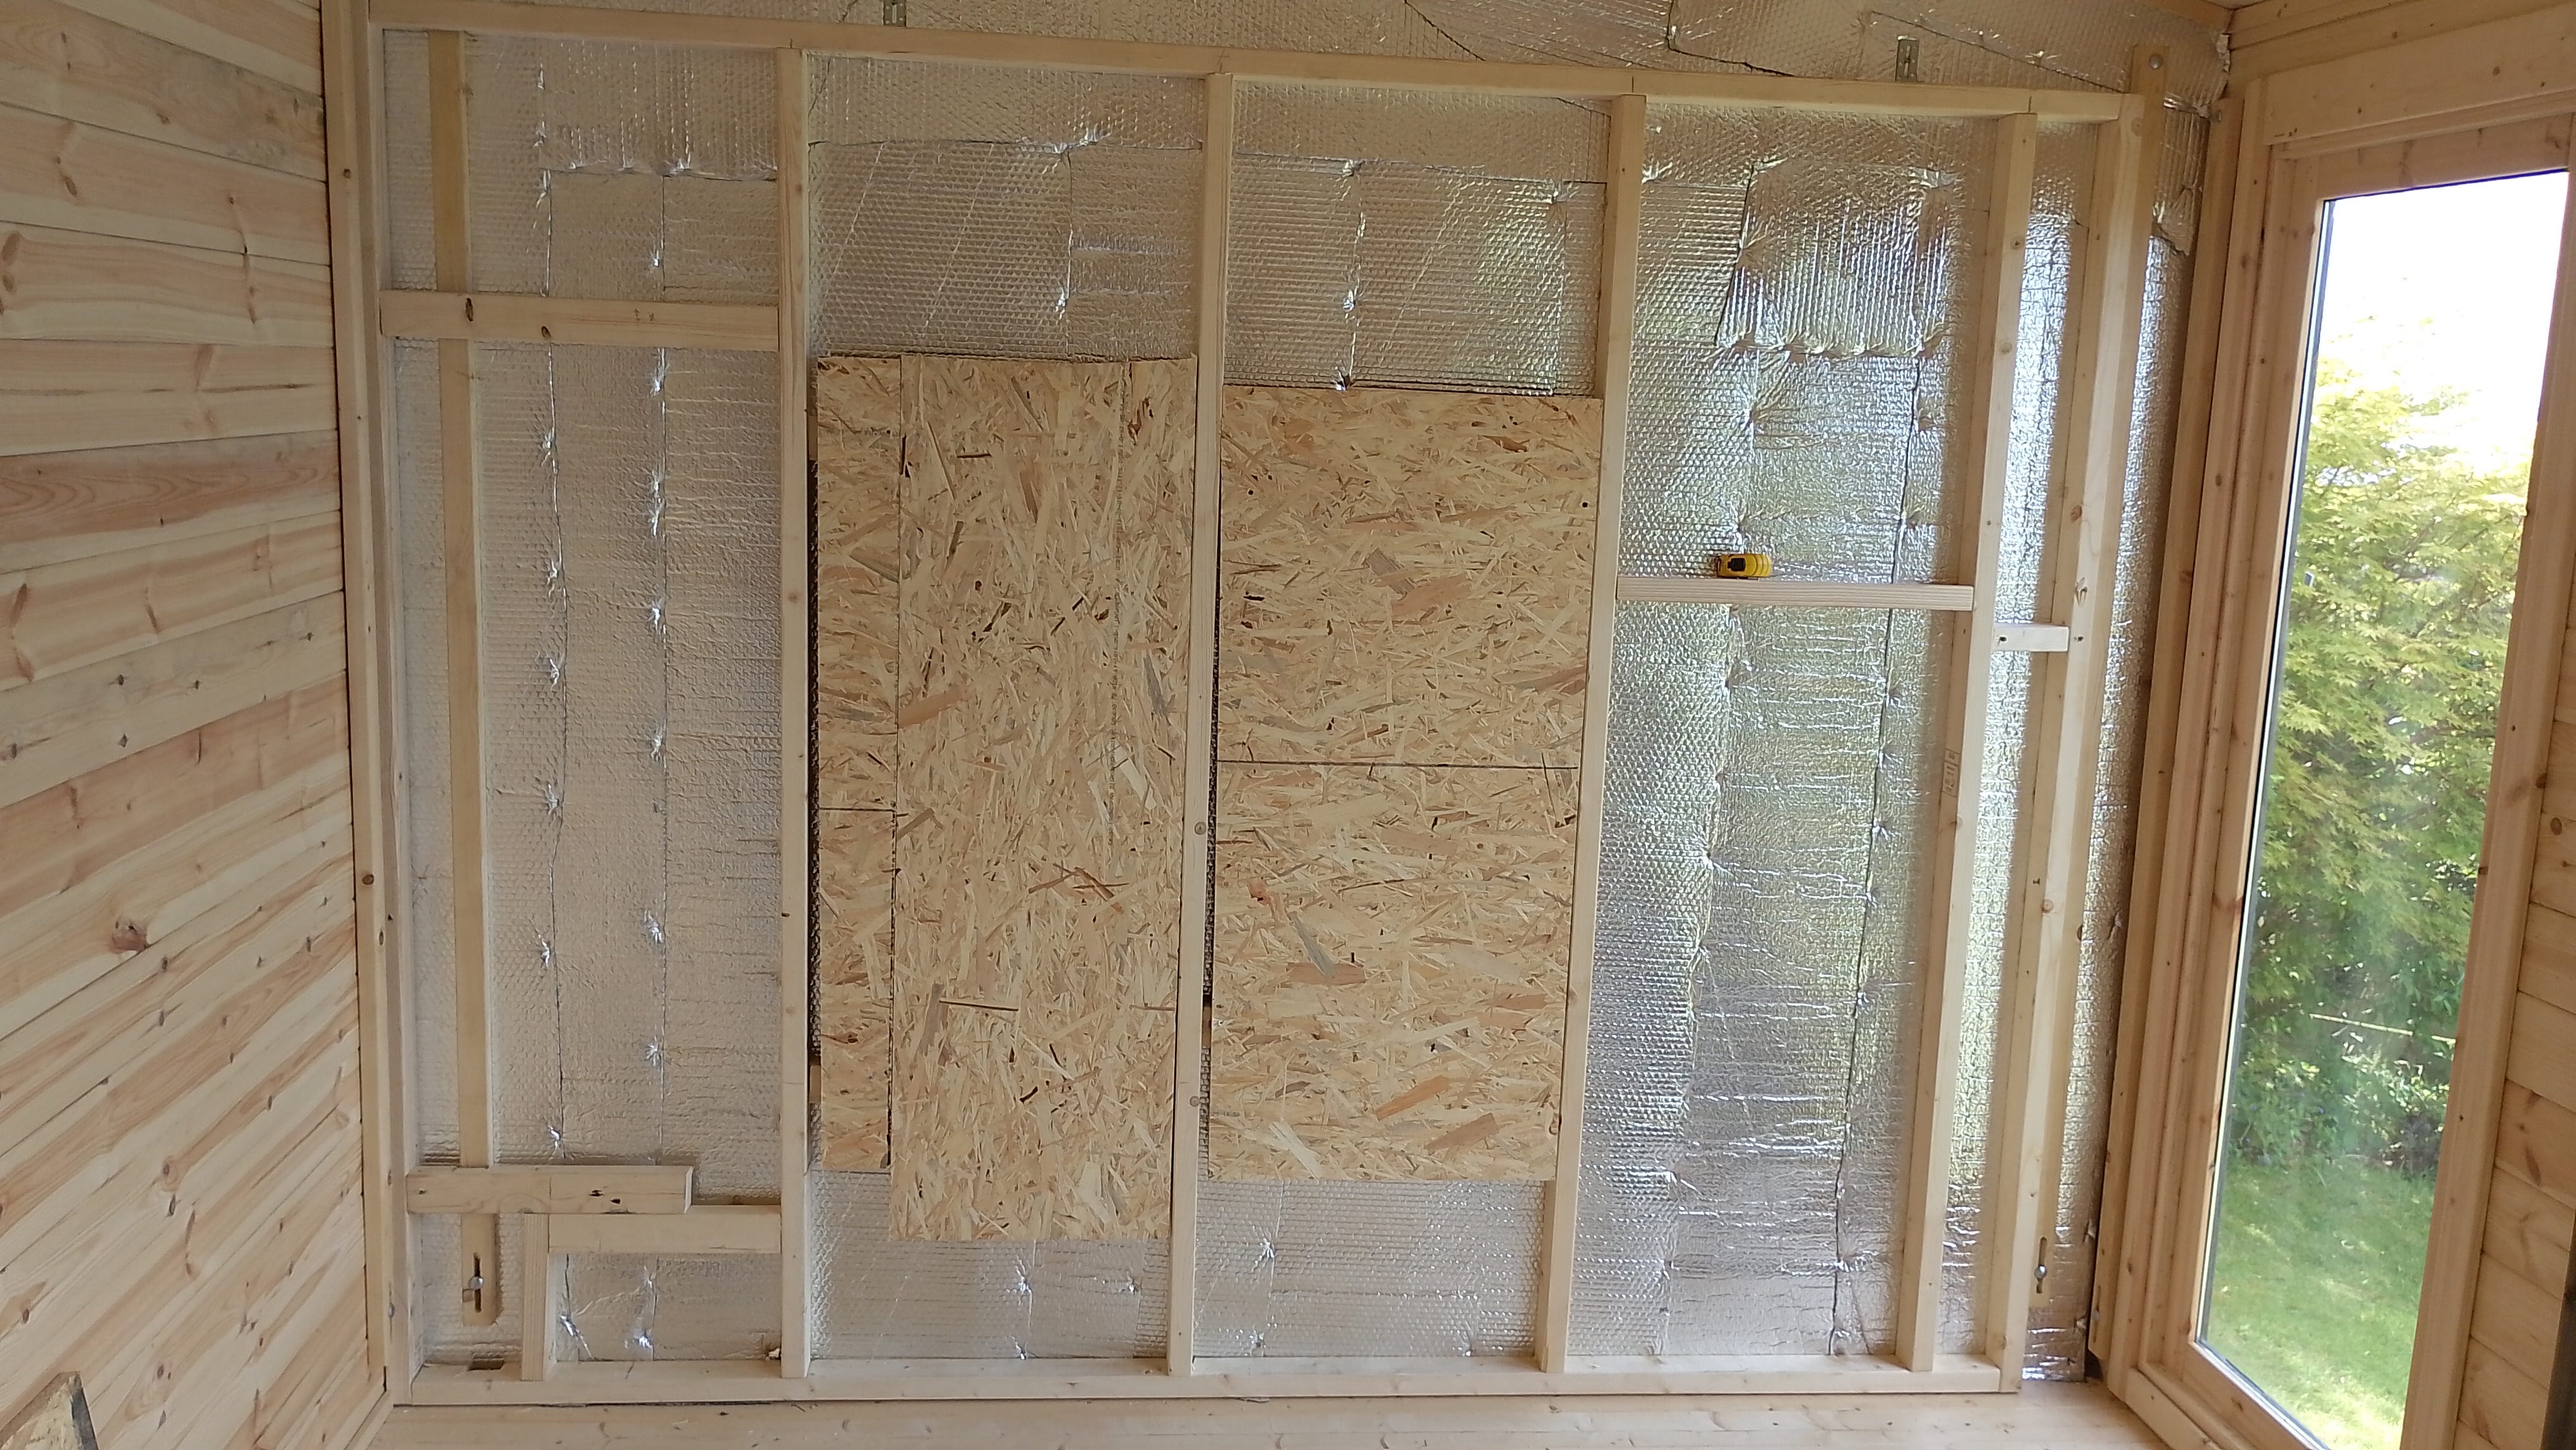
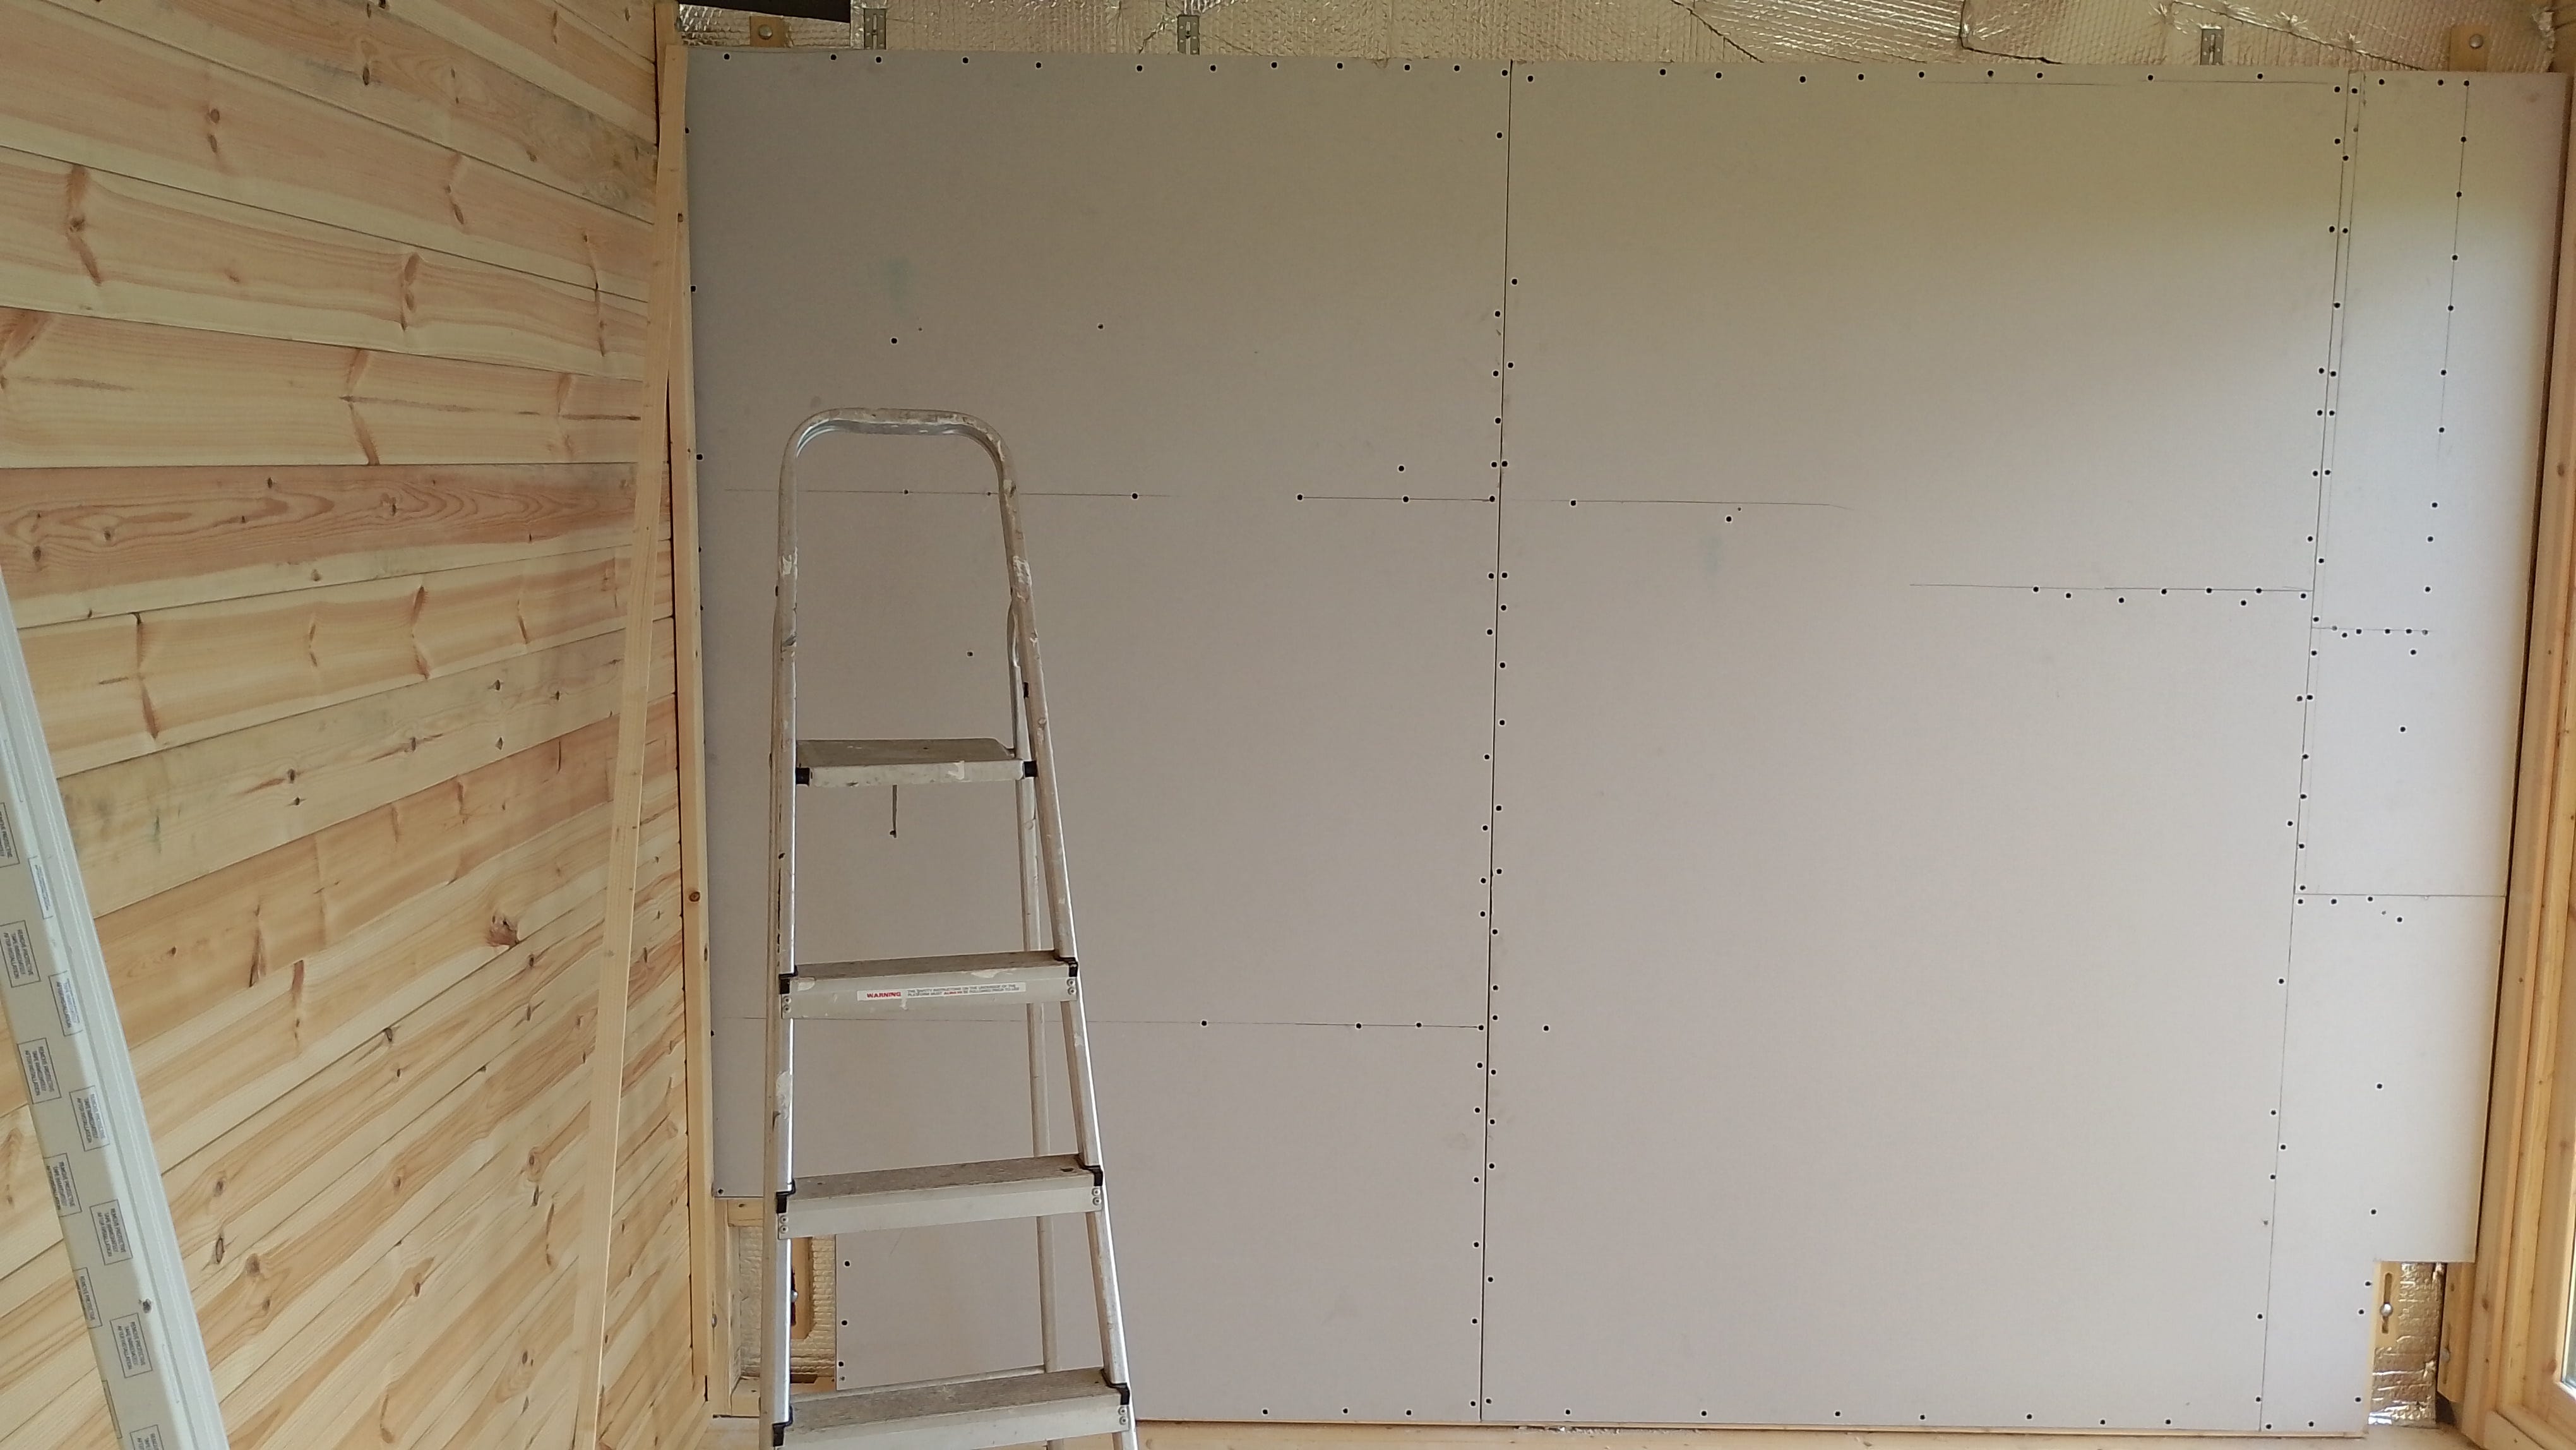
The cabin was made from thick wood so I decided initially not to insulate as I like the look of the natural wood. One wall however had the sun all afternoon so I decided to insulate and plasterboard to make a comfortable painting area that I could attach my wall easel to etc. It was not as easy as I predicted - the wall had to be floating to allow expansion of the natural log cabin walls - I used special brackets to allow for movement. I added the scrap osb panels before the plasterboard as I planned attaching a lot of screws and hangers and this would give them something to bite onto.

I varnished the floor and whitewashed all the wood then added shelving with offcuts of spare wood and the pallets the cabin came on - everything was utilised in some way.
8. The big move
It was now just a case of moving my all my studio equipment and paintings from my spare room to the cabin on the hill.
I will not go into too much detail on how I finished up the interior - a few photos will suffice. But it’s worked really well and I have started painting. Many changes will happen in the next year or so until I get everything working just right for my needs.

Finishing touches
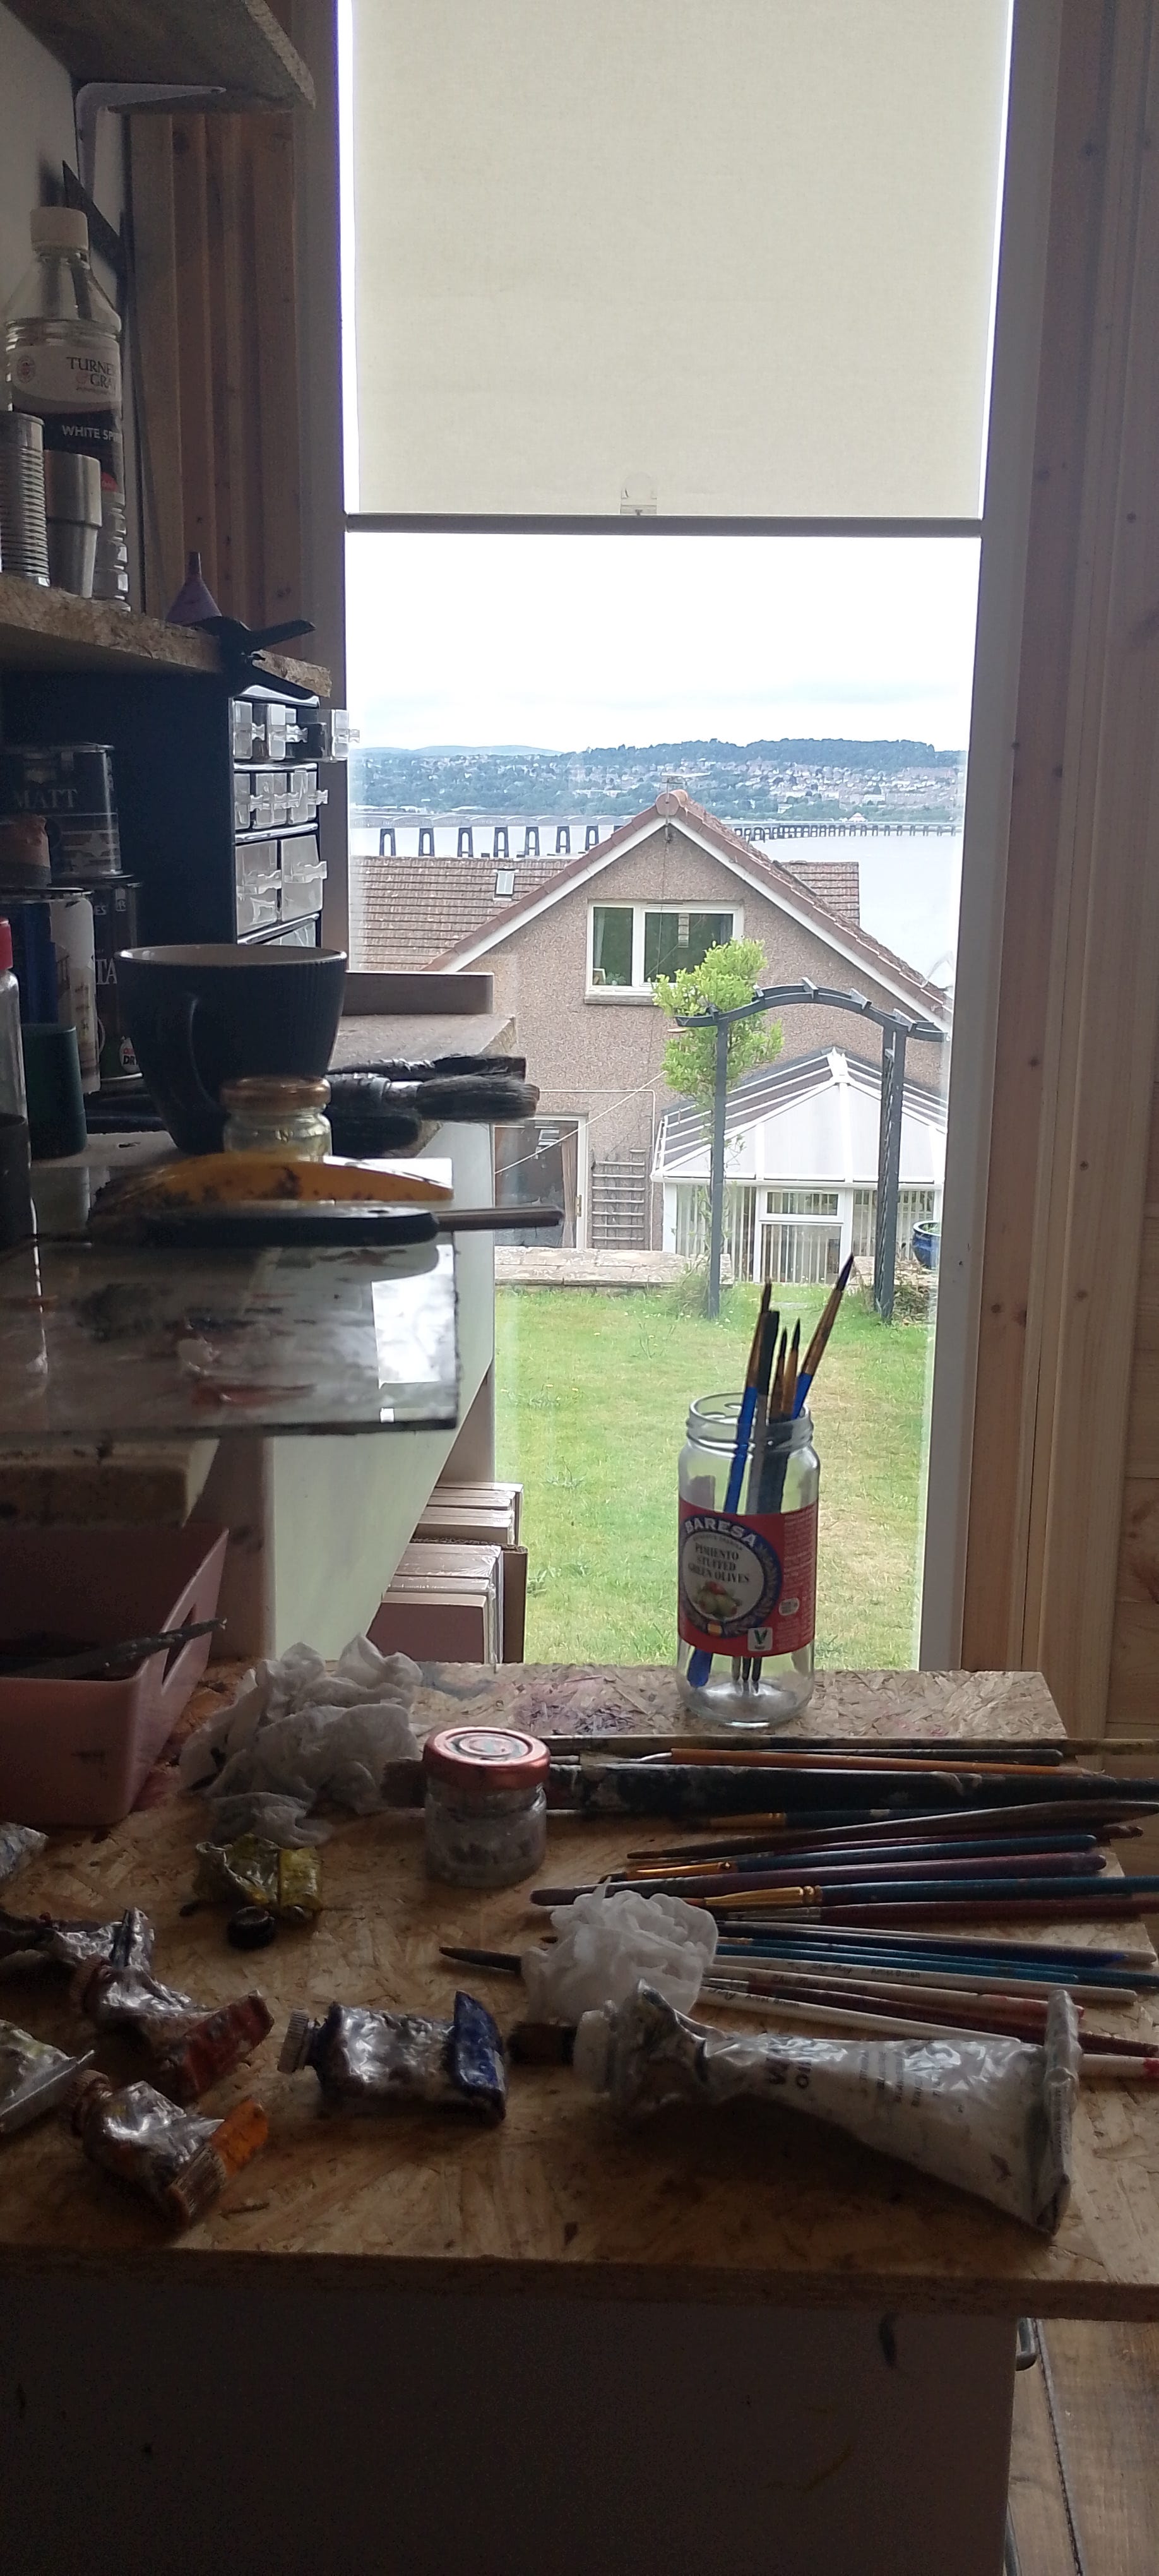
The light although north facing was intense so I added recycled patio door blinds to the windows so I could adjust things through the day, and the roof wasn’t shaded enough so I hung a sail shade for the summer months until the old ash tree regrows. My plan is to re roof and insulate with something more substantial in the future. I also painted the wall to the right hand side white to reflect back any evening sun and what a massive difference these simple solutions made to peak temperatures - I plan to work in here everyday no matter the weather conditions.
So did I manage the 4k budget?
Unbelievably… pretty much yes! The total cost was about £4200 with a lot of material and tools left over to be utilised elsewhere.
I now have a new studio - built myself - fully powered and with beautiful panoramic views - at a fraction of cost I had envisaged. If I move again to renovate a new place (which we do every few years) the cabin will hopefully make itself back, if not add more value.
But it was hard work…I was even bitten by a tick several times and then had to be treated for potential lime disease!
I wrote about my make do and mend ethos previously, and I stuck to this as much as I possibly could - eking out every material - utilising every scrap. This is not to say any corners were cut, some aspects were verging on obsessive and nothing I truly needed was scrimped on.
It’s now time to let the building grow into the landscape - add some plants and some creepers to grow up the trellis - just let everything settle in really. The old ash tree will grow round the building giving me some much needed shade in the summer months
This is just the beginning and as I work I will tweak and add things - a log burner for winter and another window perhaps - these things will manifest in time.
This post is a bit technical, but I hope it may lend as inspiration for others to do the same. It’s not just about having a ‘cool studio’ but acquiring life skills - building self confidence and self reliance; being one with nature and learning to work with its rhythms. These projects help to keep me centred and on the path of a more self sufficient creative path in what are becoming more difficult times to thrive financially in the UK. I hope to share my journey as I progress.
This is a super inspiring build! So many helpful details about your journey too. So happy I found this post.
Bravo my friend no end to your talents 👏 👏 👏